
What is a webhook?
Polling and webhooks
An application can use a webhook to receive and process events in real time. A service that uses polling checks for new signups at regular intervals. It won’t detect a signup until its next check. With a webhook, the service receives the signup event as it happens and can respond immediately.Webhooks in Notifly
In Notifly, these events can trigger a webhook:- A user triggers an event.
- A one-time or recurring send reaches its scheduled time.
Prerequisites
-
A server that can receive webhooks
- Use a server that Notifly can reach over the public internet and that can accept HTTP requests.
- Configure DNS so Notifly can reach your server at the specified URL.
-
An IP allowlist for Notifly
-
Configure your network policy to allow inbound requests from Notifly webhook servers. Ask Notifly to confirm the current outbound IP addresses before you apply the allowlist below.
3.38.74.15143.201.228.10343.200.138.23
-
Configure your network policy to allow inbound requests from Notifly webhook servers. Ask Notifly to confirm the current outbound IP addresses before you apply the allowlist below.
Create and personalize a webhook campaign
Create a webhook campaign
Enter the following details to create a webhook campaign. To include user-specific information in the request, see Message personalization.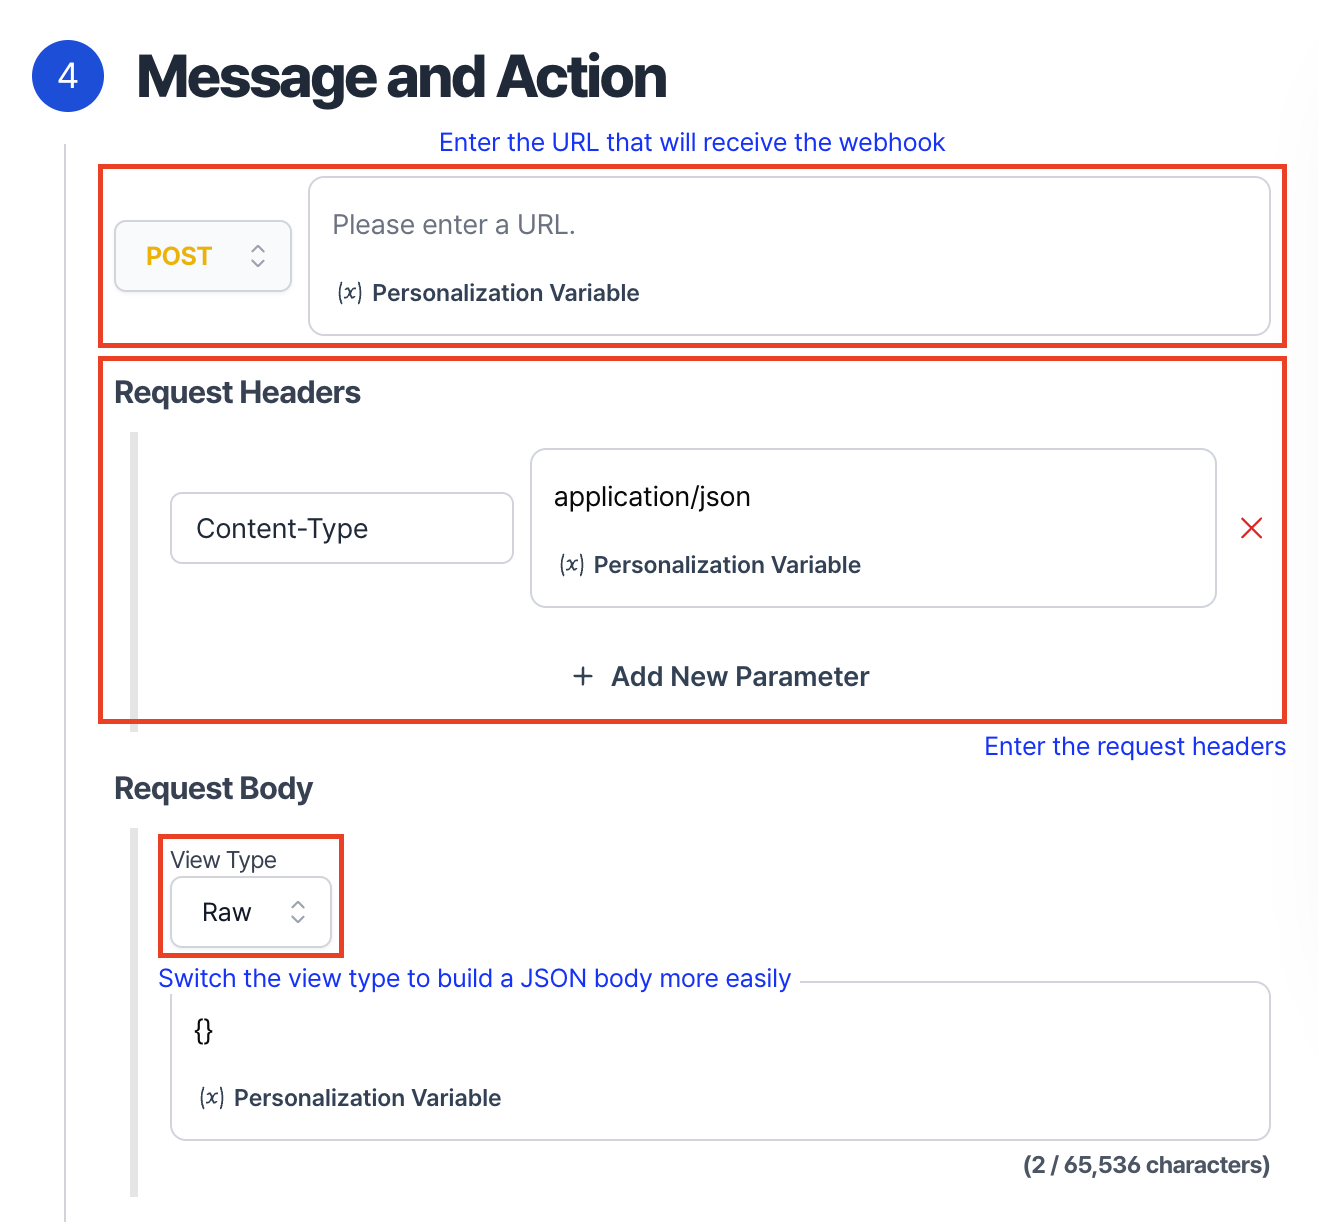
- Enter the URL that will receive the webhook.
- Choose the HTTP method. Notifly supports
GET,POST,PUT, andDELETE. - Under Request Headers, enter each header as a key-value pair.
- Enter the request body under Request Body. The editor hides this field for
GETrequests.
Personalize the request
Notifly uses the Liquid template language for message personalization. The following example uses user properties in the webhook body.name or email property, Notifly substitutes an empty string for the missing value.
If you use JSON for the body, make sure your Liquid template renders valid JSON. Use Liquid’s json filter to encode values as JSON.
This template includes the user’s The following test data contains both The template produces this output.If the
properties object when it is available and outputs null when it is missing.name and properties.properties value is missing, the template renders the following output.Test personalization
- Check that the template renders correctly in the Liquid JS Playground.
-
In Notifly, enter the URL and choose the HTTP method. Add headers or a body as needed, then click Send Test.
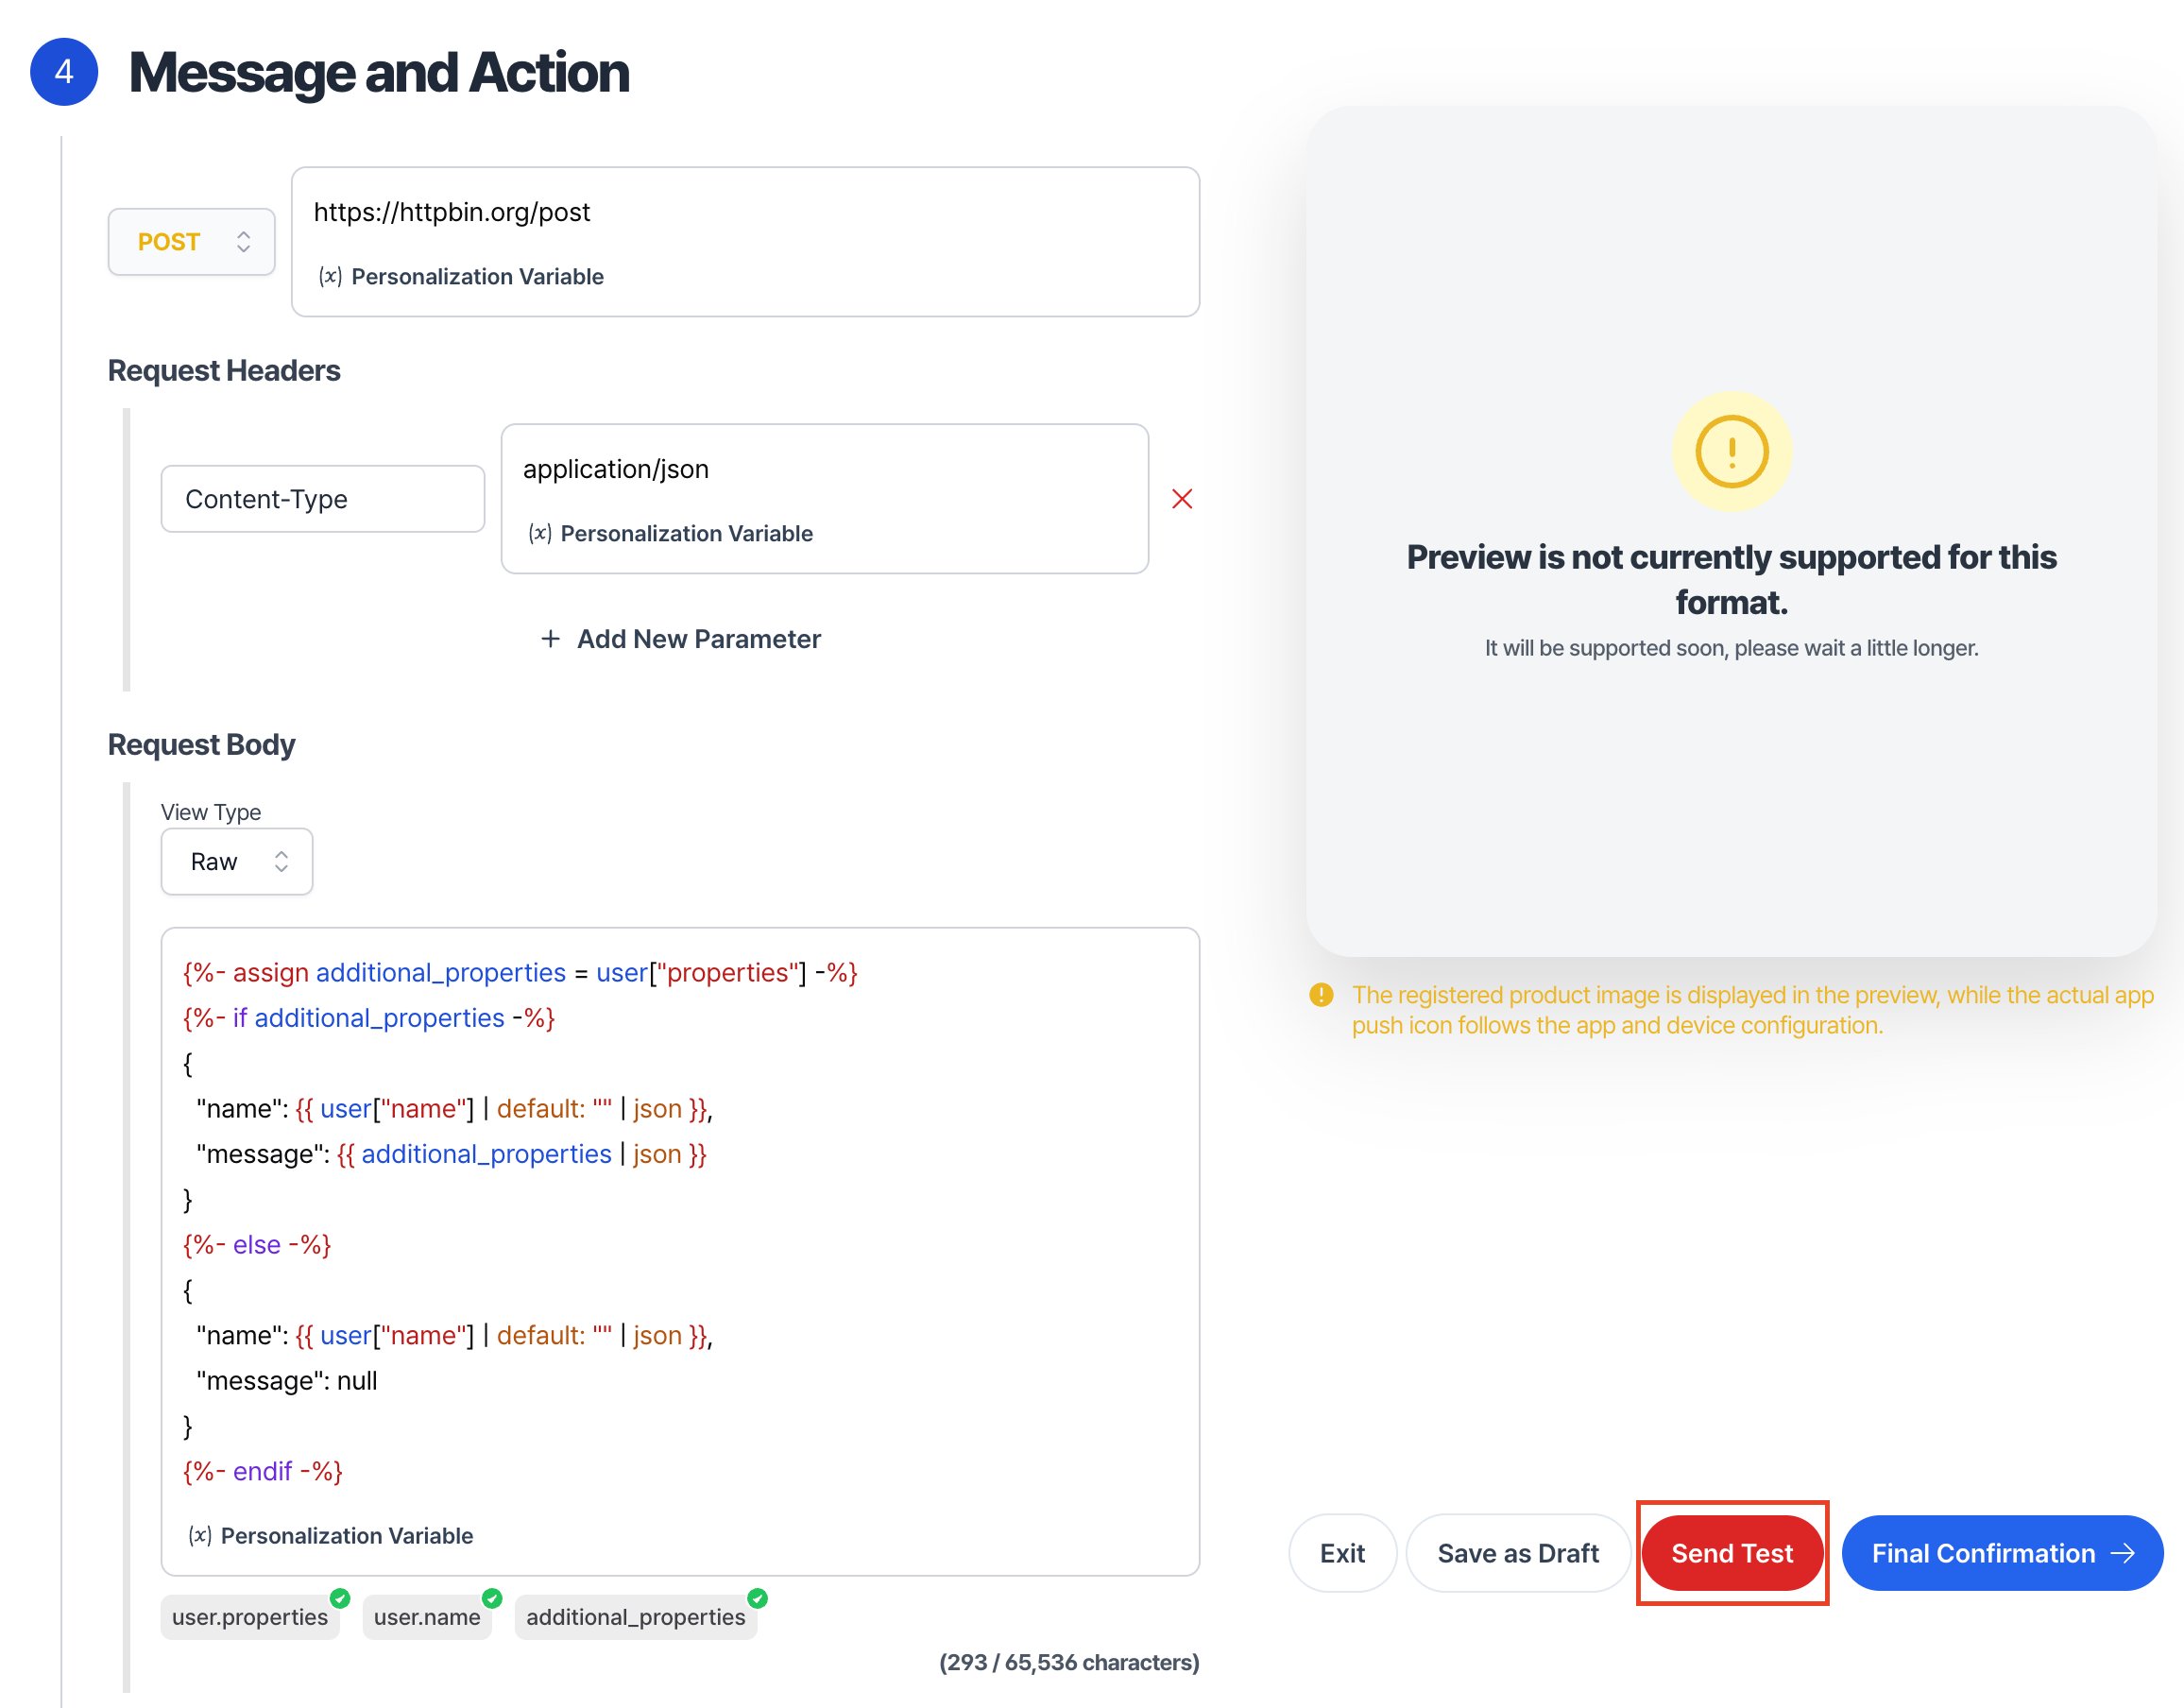
- Enter the external user ID of the test user, shown as User ID in the user list. Click Send. Notifly uses that user’s data to send a request to the configured URL.
- In the receiving server’s logs, check that the request arrived with the expected method, headers, and body.
Delivery results
- Notifly marks the send as failed if the request times out after 5 seconds.
- Notifly records HTTP 2xx responses as successful sends. Other outcomes count as failures.