
The SDK supports the following features:
- Register device information with Notifly to receive web push notifications and display web popups.
- Send events and user information to Notifly for campaign targeting and analytics.
- Log user actions as events and measure campaign performance.
Before you begin
- Create a VAPID key. To send and receive web push notifications, create a VAPID key in the console under Settings > SDK Settings > Website Settings. This step is required only if you use web push notifications.
- HTTPS is recommended because of browser permission policies. The recommended environment is a current version of Chrome, Edge, or Safari with ES2017 or later. If you use a build tool such as Webpack, Vite, or Rollup, configure it to include the service worker file in the build output.
1. Basic setup
1. Register a service worker
Create a service worker file in the root directory to receive push notifications while the browser runs in the background.- React
- Vanilla JS
notifly-service-worker.js:
You can choose the service worker filename and path. The path must match the
serviceWorkerPath initialization setting.2. Initialize the SDK
A placeholder for backward compatibility. Include it in the initialization options. Do not enter a real password or API Secret Key. Pass the same nonempty value as
username.Session duration in seconds. Minimum 300, default 1800. Version 2.5.0 and later use the console setting.
Web push options. Version 2.5.0 and later use the console settings.
In SDK 2.5.0 and later, the console settings replace all initialization settings except 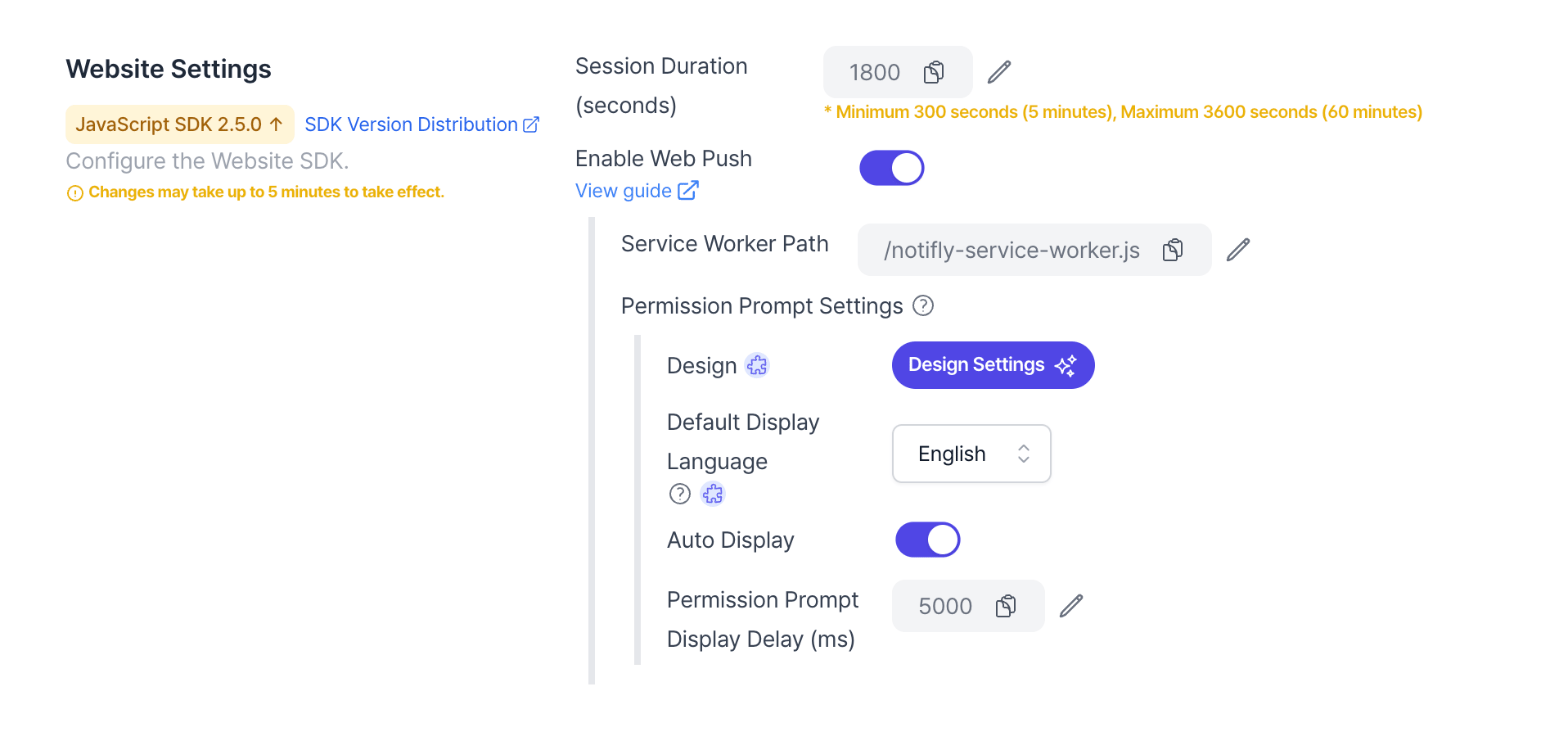
projectId and username. This includes the session duration, permission prompt, service worker path, prompt delay, and VAPID key. password is a placeholder for backward compatibility. Do not enter a real password or API Secret Key. 3. Request push notification permission
If you enable the permission prompt (askPermission) in the console, visitors first see a prompt at the top of the page, followed by the browser permission dialog.
Permission requests follow these rules:
- If the user has not set a notification permission, the SDK shows the introductory prompt, then requests browser permission.
- If the user has already allowed notifications, the SDK does not show the prompt or request permission again.
- If the user has blocked notifications, the SDK does not request permission again or show the prompt.
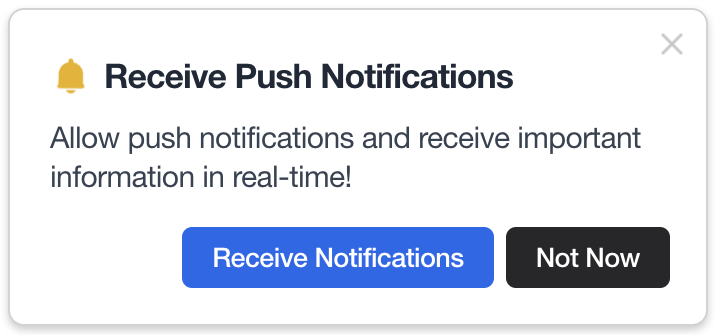
- To match the prompt text and colors to your brand, see the prompt customization section below.
- To use your own permission UI:
- For SDK 2.5.0 and later, disable automatic display in the Notifly console.
- For SDK versions earlier than 2.5.0, set
askPermission: falsewhen you initialize the SDK. - Then implement the permission request in your own UI.
- See
MDN Web Docs - Notification: requestPermission.
Supported languages
The SDK permission prompt supports the following languages:- SDK 2.8.0 and later
- ko (Korean)
- en (English)
- ja (Japanese)
- zh (Chinese)
- SDK versions earlier than 2.8.0
- Only Korean and English are supported.
Request permission manually
- Requires SDK 2.7.0 or later.
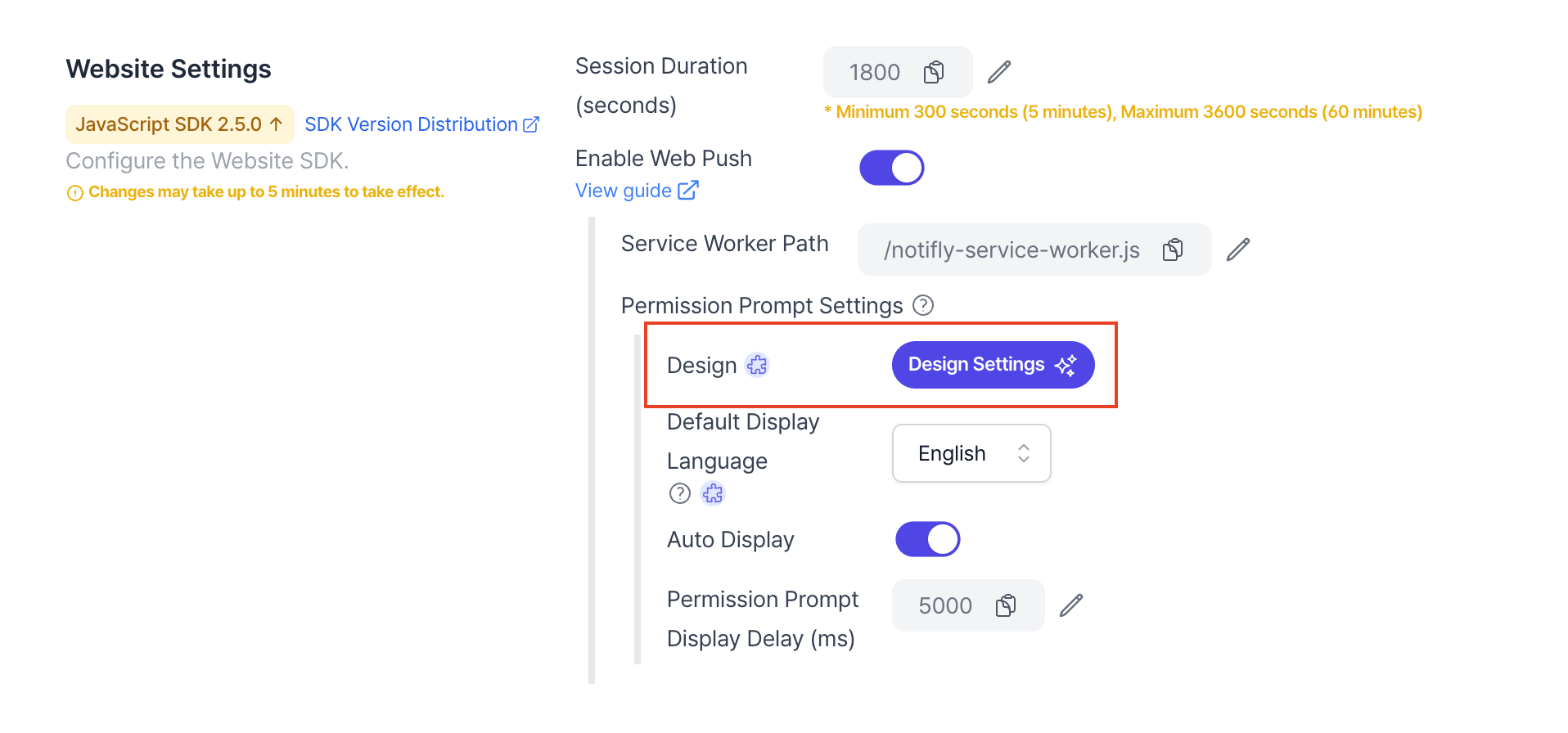
- In the Notifly console, go to Settings > SDK Settings > Website Settings > Permission Prompt Settings and turn off Auto Display.
- If you pass the language parameter, the SDK attempts to display the prompt in that language.
- If you omit the parameter or pass an unsupported language code, the SDK uses the browser language if supported. Otherwise, it uses the default display language described below.
Default display language
This setting requires Notifly JavaScript SDK 2.8.0 or later. In earlier versions, the default language is always Korean (
ko).- The browser has no preferred language.
- The SDK does not support the browser language.
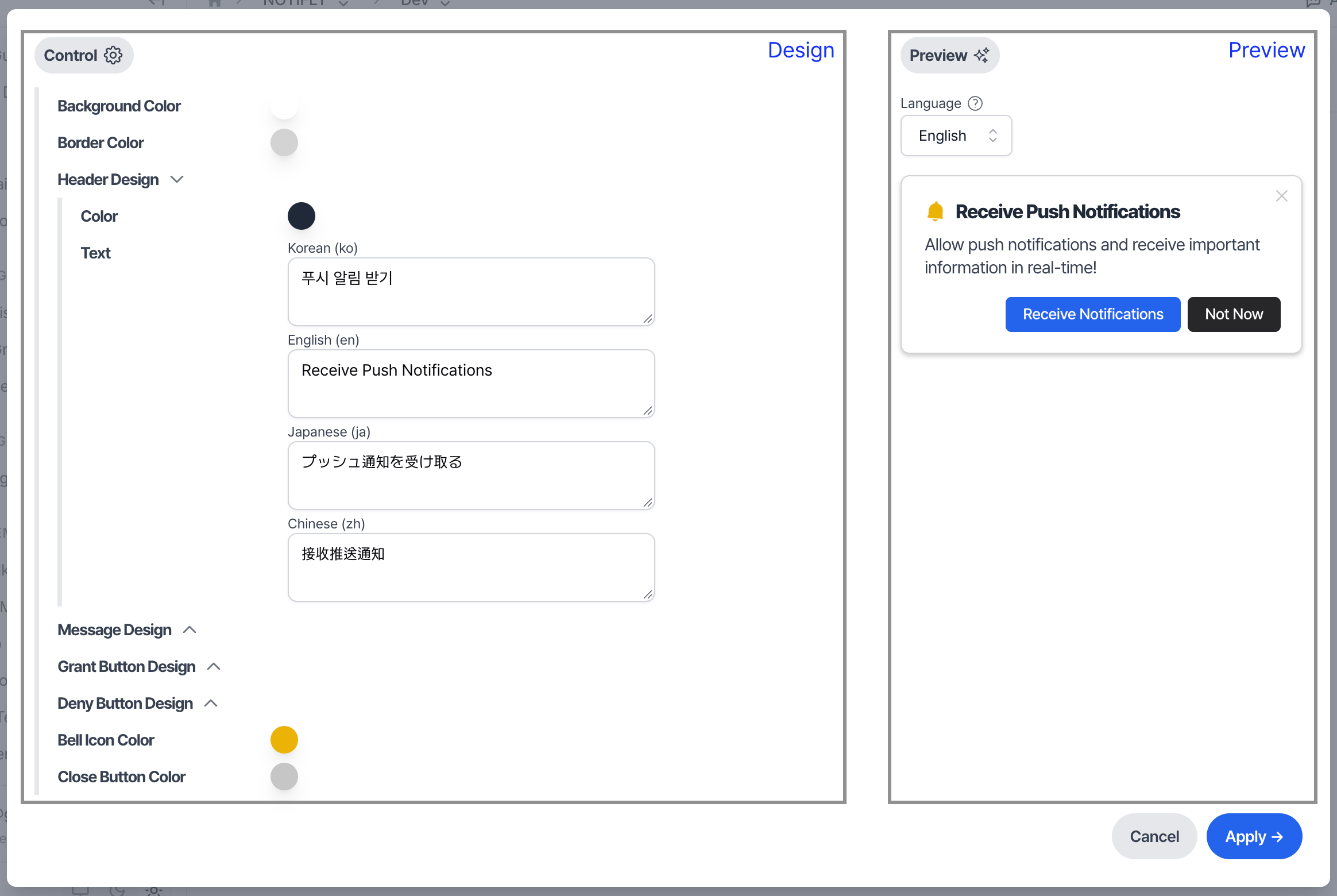
Customize the permission prompt
- Prompt customization requires Notifly JavaScript SDK 2.7.0 or later. Earlier versions display the SDK’s default prompt.
- Design changes in the console may take a few minutes to appear for users.
Collect consent with a web popup button
Use Button > Click action > Web push consent in the web popup editor to let the SDK save consent, request browser notification permission, and register the push subscription. This action also supports anonymous users. You do not need to callsetUserId() separately to collect consent. For console setup, see the web popup user guide.
Prepare the integration
- Install and initialize a JavaScript SDK version that supports this action on your website. The consent button is disabled if the SDK does not support it.
- Enable web push in the console under Settings > SDK Settings > Website Settings and configure the VAPID key and service worker path. The service worker must be registered successfully at that path.
- To request permission through this popup only, disable Auto Display. The button action works even when the console setting
web_push_options.ask_permissionisfalse. - Serve your production website over HTTPS. Confirm that the browser and runtime support notifications and web push.
allowUserSuppliedLogEvent, and you do not need to add calls to trackEvent() or requestPermission() to the button HTML. Use notifly.requestPermission() to show the Notifly permission prompt separately. This call does not record the consent properties for this action.
SDK processing flow
- The consent button becomes active when a compatible SDK sends a ready response to the popup.
-
When the user clicks the button, the SDK updates the following reserved properties through an internal
set_user_propertiesevent. - The SDK starts the browser permission request in direct response to the user’s click, without waiting for storage or analytics events to complete. It skips the Notifly introductory modal and starts the request before any popup closing animation.
- The SDK closes the web popup immediately after starting the permission request. It does not wait for the browser response or server transmission to finish.
-
If permission is granted, the SDK registers the existing or new
PushSubscriptionasdevice_tokenin an internalset_device_propertiesevent, independently of closing the popup. If permission is denied, the dialog is dismissed, the environment is unsupported, or processing fails, the SDK does not reopen the web popup or show a result message. It does not request permission again if permission is already granted or blocked.
notifly__main_button_click event. The SDK does not send a separate custom event named web_push_consent. The popup’s button name setting supplies button_name.
Clicking the consent button closes the popup, so duplicate clicks on the same popup are not processed. Consenting in a new popup updates the timestamp. The SDK sends the user properties that record consent and the push subscription to Notifly. Browser notification permission applies to the site. When permission is granted, the push subscription is registered to the currently signed-in user, as it is when the page loads.
Run custom actions after a consent button click
Use notifly.setPopupActionHandler() to run additional site actions when the consent button is clicked. Your JavaScript SDK version must include this API.
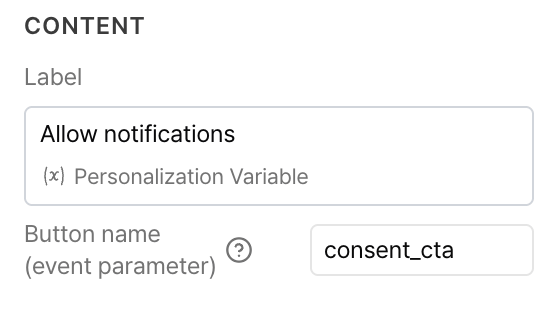
In the Button block, set 버튼 이름 (이벤트 파라미터) to consent_cta. The screenshot labels this field Button name (event parameter). Add the following code to your website code, where the SDK is installed. Register the handler once in your site initialization code after the SDK loads. You can register it before calling notifly.initialize().
consent_cta across all campaigns. To handle only a specific campaign, also check event.campaignId.
The callback indicates that the consent button action occurred. It does not confirm that browser permission was granted or that the server saved the data. The SDK handles consent recording and the permission request, so you do not need to call setUserProperties() or requestPermission() again in the callback. The SDK continues its normal flow without waiting for the callback to finish.
Only one handler can be registered. Registering another handler replaces the previous one. Call notifly.setPopupActionHandler(null) to remove it when no longer needed.
Record consent and handle withdrawal
The reserved properties do not mirror the browser’s Notification.permission. After the user consents through the button, the stored consent remains even if they deny browser permission or dismiss the dialog. Conversely, an existing browser permission of granted does not create this action’s consent properties.
If your service provides a separate withdrawal UI, update consent as follows when the user withdraws it.
$web_push_consent is true. The call leaves $web_push_consented_at unchanged because it records the last consent time.
The console preview records only the click action log. It does not update properties, request permission, or register a subscription. On your website, test unset, granted, and blocked permission states, as well as anonymous users and sign-in transitions. Browser blocking or unsupported environments may prevent the permission dialog from appearing.
2. Install and initialize the SDK
The badge below shows the latest version:

1. Package manager (npm, yarn, or pnpm)
- npm
- yarn
- pnpm
Initialization example (v2.5.0 and later)
SetprojectId and username to your project’s integration values. password is a placeholder for backward compatibility. Do not enter a real password or API Secret Key. Include the field in the initialization options and pass the same nonempty value as username.
- v2.5.0 and later
- v2.4.0 and earlier
2. CDN
Add the script inside<body>. After it loads, access the SDK through window.notifly.
- IIFE (recommended for v2.7.4+)
- UMD (v2.5.0+)
- UMD (v2.4.0 and earlier)
3. Register user information
Notifly uses the user ID (userId) and user properties (userProperties) to personalize marketing campaigns.Registered user information is used for segmentation and targeting across channels such as push notifications, email, and Kakao AlimTalk.
1. Set the user ID
Parameters
- React
- Vanilla JS
2. Set user properties
Before sending sensitive user propertiesBefore sending custom user properties that need protection, such as names or addresses, register each key under User Management > User List > Property management in the console and enable encryption. Use the same key names as in the data you send.For setup instructions and limitations, see the property management guide.
Parameters
- React
- Vanilla JS
setUserProperties
Reserved property keys. Use the exact reserved names for keys used in channel delivery and personalization, such as
$email, $phone_number, and $line_user_id.4. Log events
Record user actions for campaign triggers, segment conditions, and performance analysis.For example, collect button clicks, page views, and completed purchases as events.
Parameters
Use
segmentationEventParamKeys to make event parameters (eventParams) available for targeting and related settings. You can specify at most one key.- React
- Vanilla JS
trackEvent