
1. Register a user and send events
1. Set the user ID
The SDK creates an anonymous user if you do not set a user ID. CallsetUserId with the ID your app uses for that user so Notifly can identify them consistently.
2. Set user properties
CallsetUserProperties to set the user’s properties.
3. Send events
- Use the Notifly SDK’s
trackEventmethod to send user actions, such as page views and clicks, as events.
2. Verify the user and events
- Sign in to Notifly.
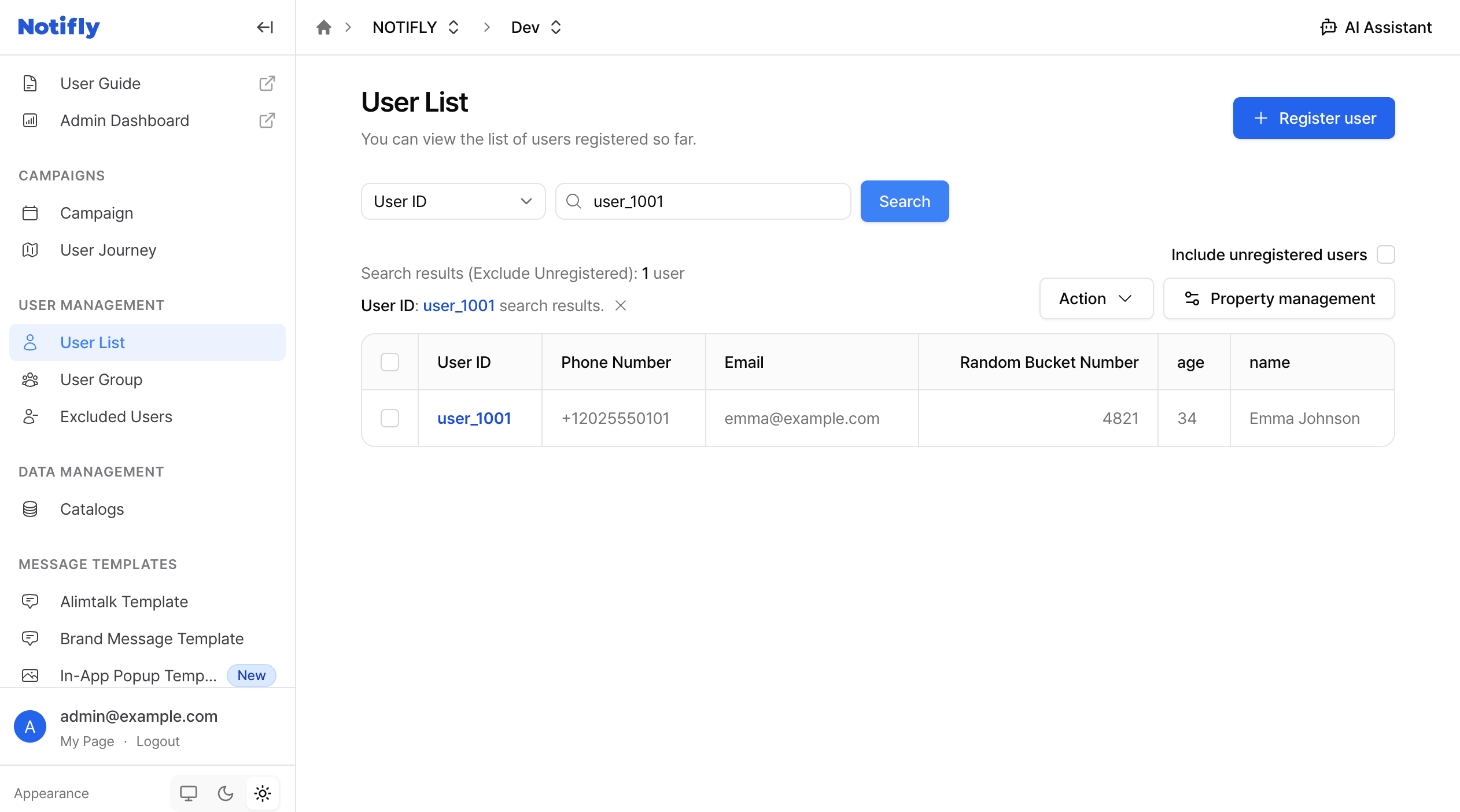
- In the upper-right corner, check that the selected development or production project contains the test user.
- Go to User Management > User List.
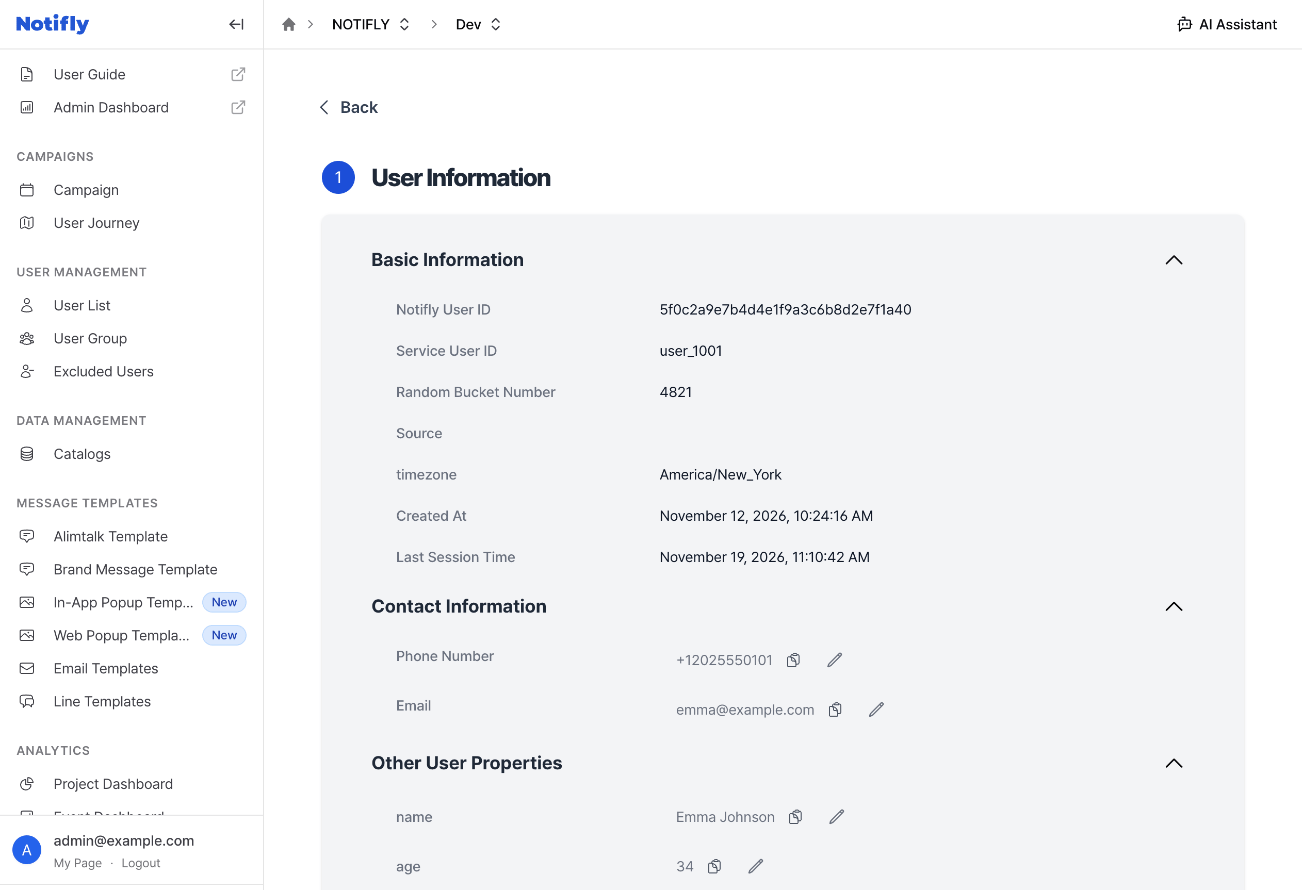
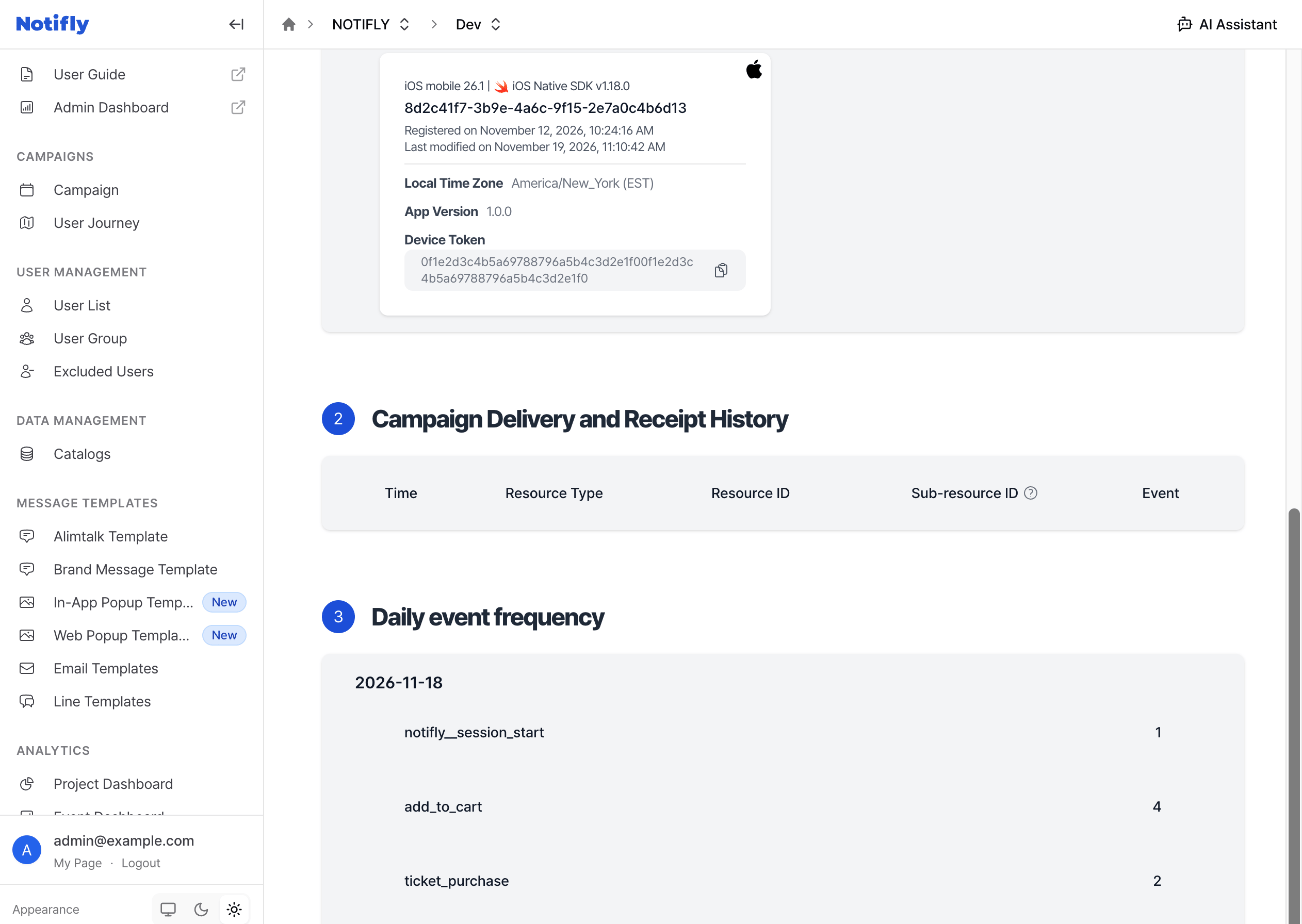
- Select the test user and check the following on the user profile page.
- The user ID is registered.
- User properties such as
$emailand$phone_numberhave the expected values. - The event log contains the events that you sent.
3. Test app push notifications
- In the console, open the campaign creation page.
- In the tabs in the upper-right corner, select the project that contains the test user.
- Under Basic Information and Channel, select App Push.
- Under Message and Action, write the push message.
- Enter the notification title in Message Title.
- Enter the notification text in Message Content.
- Under Action, enter the URL or deep link to open when the user taps the notification.
- Test the tap action when the app is in the foreground, in the background, and terminated.
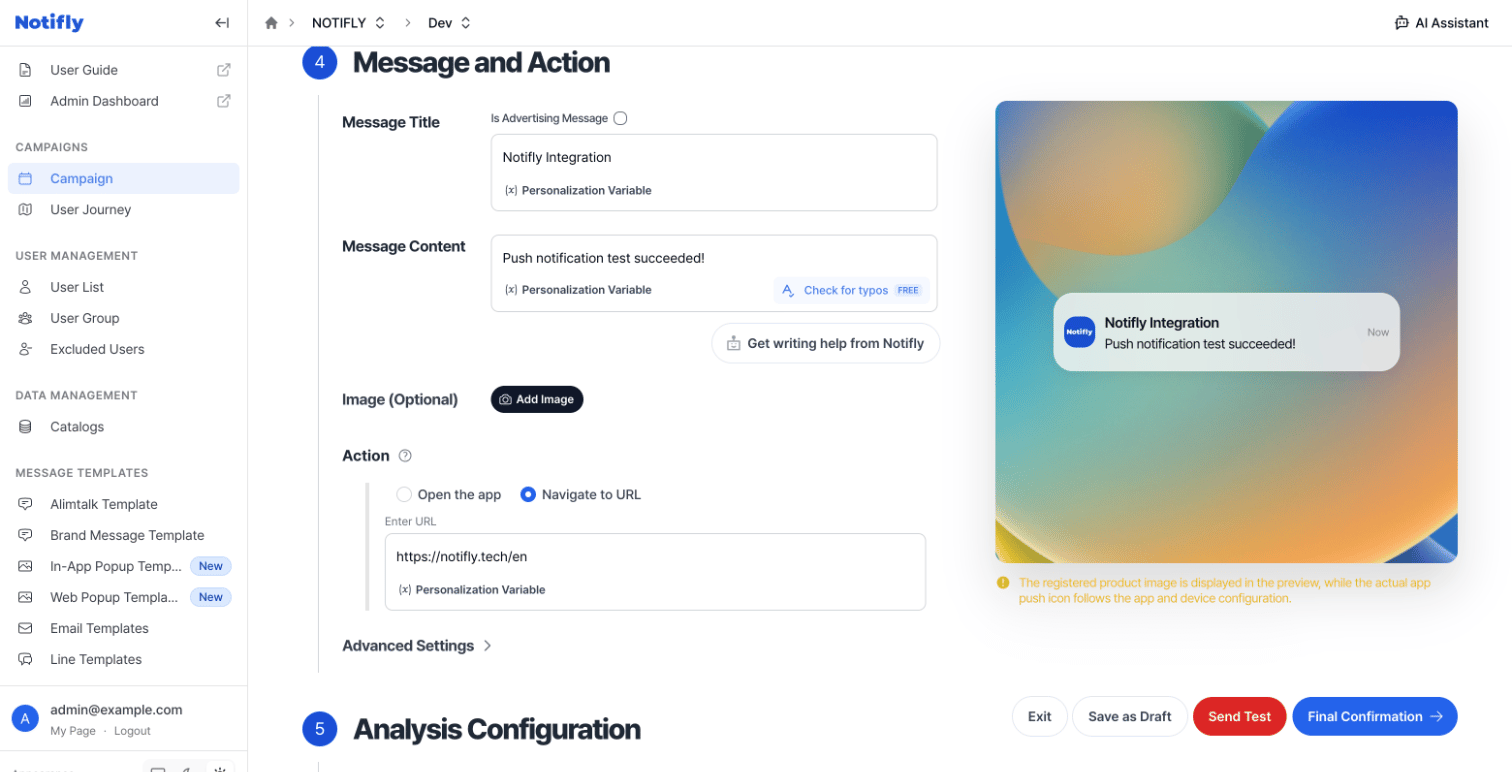
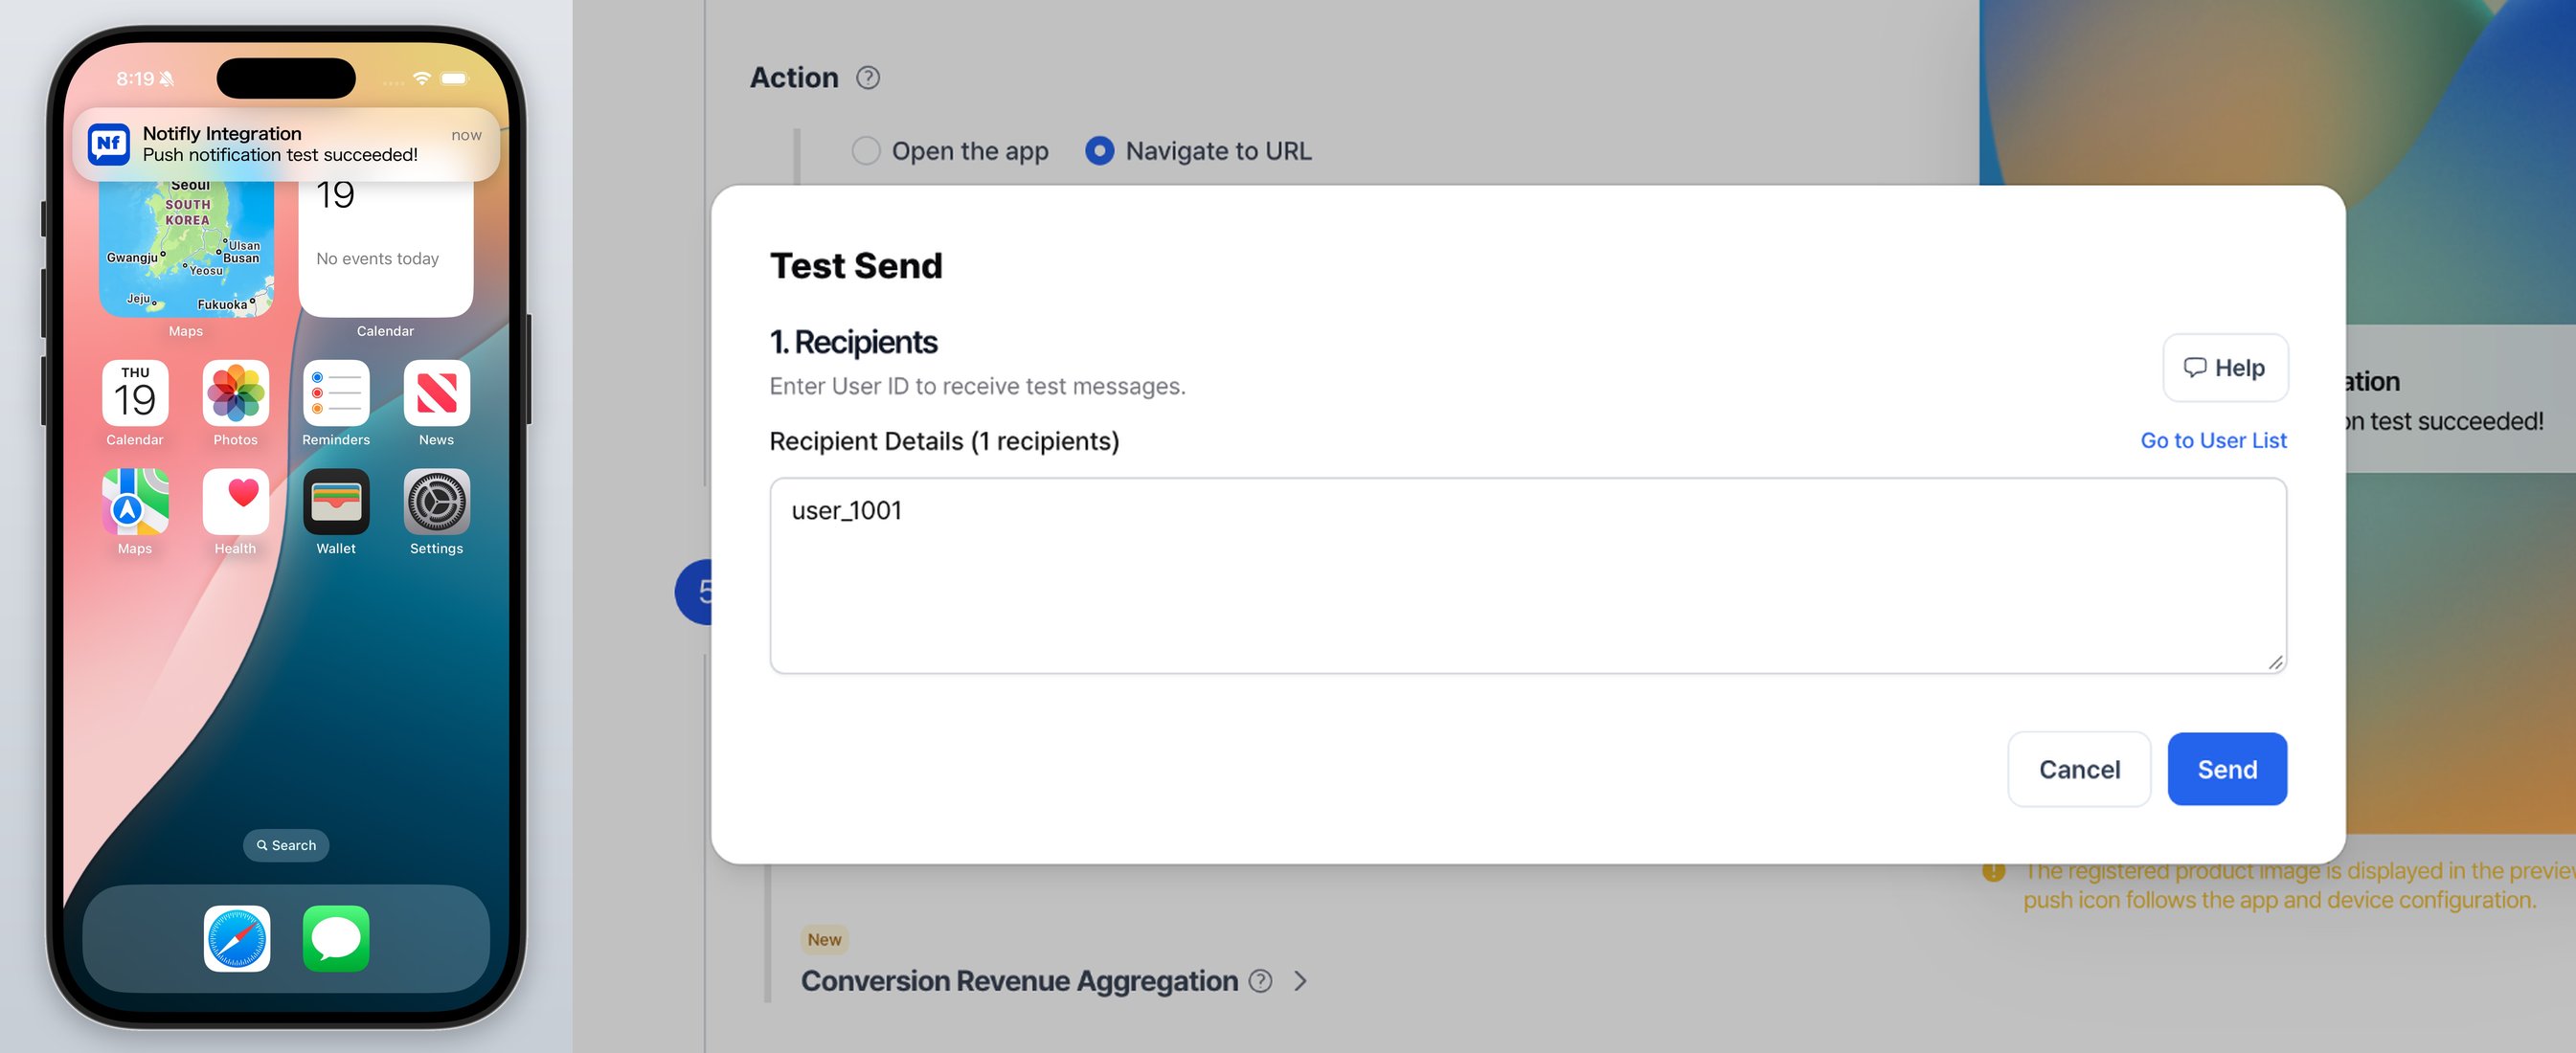
- Click Send Test in the lower-right corner. In the Test Send dialog, enter the test user ID under Recipients and click Send.
4. Test in-app popups
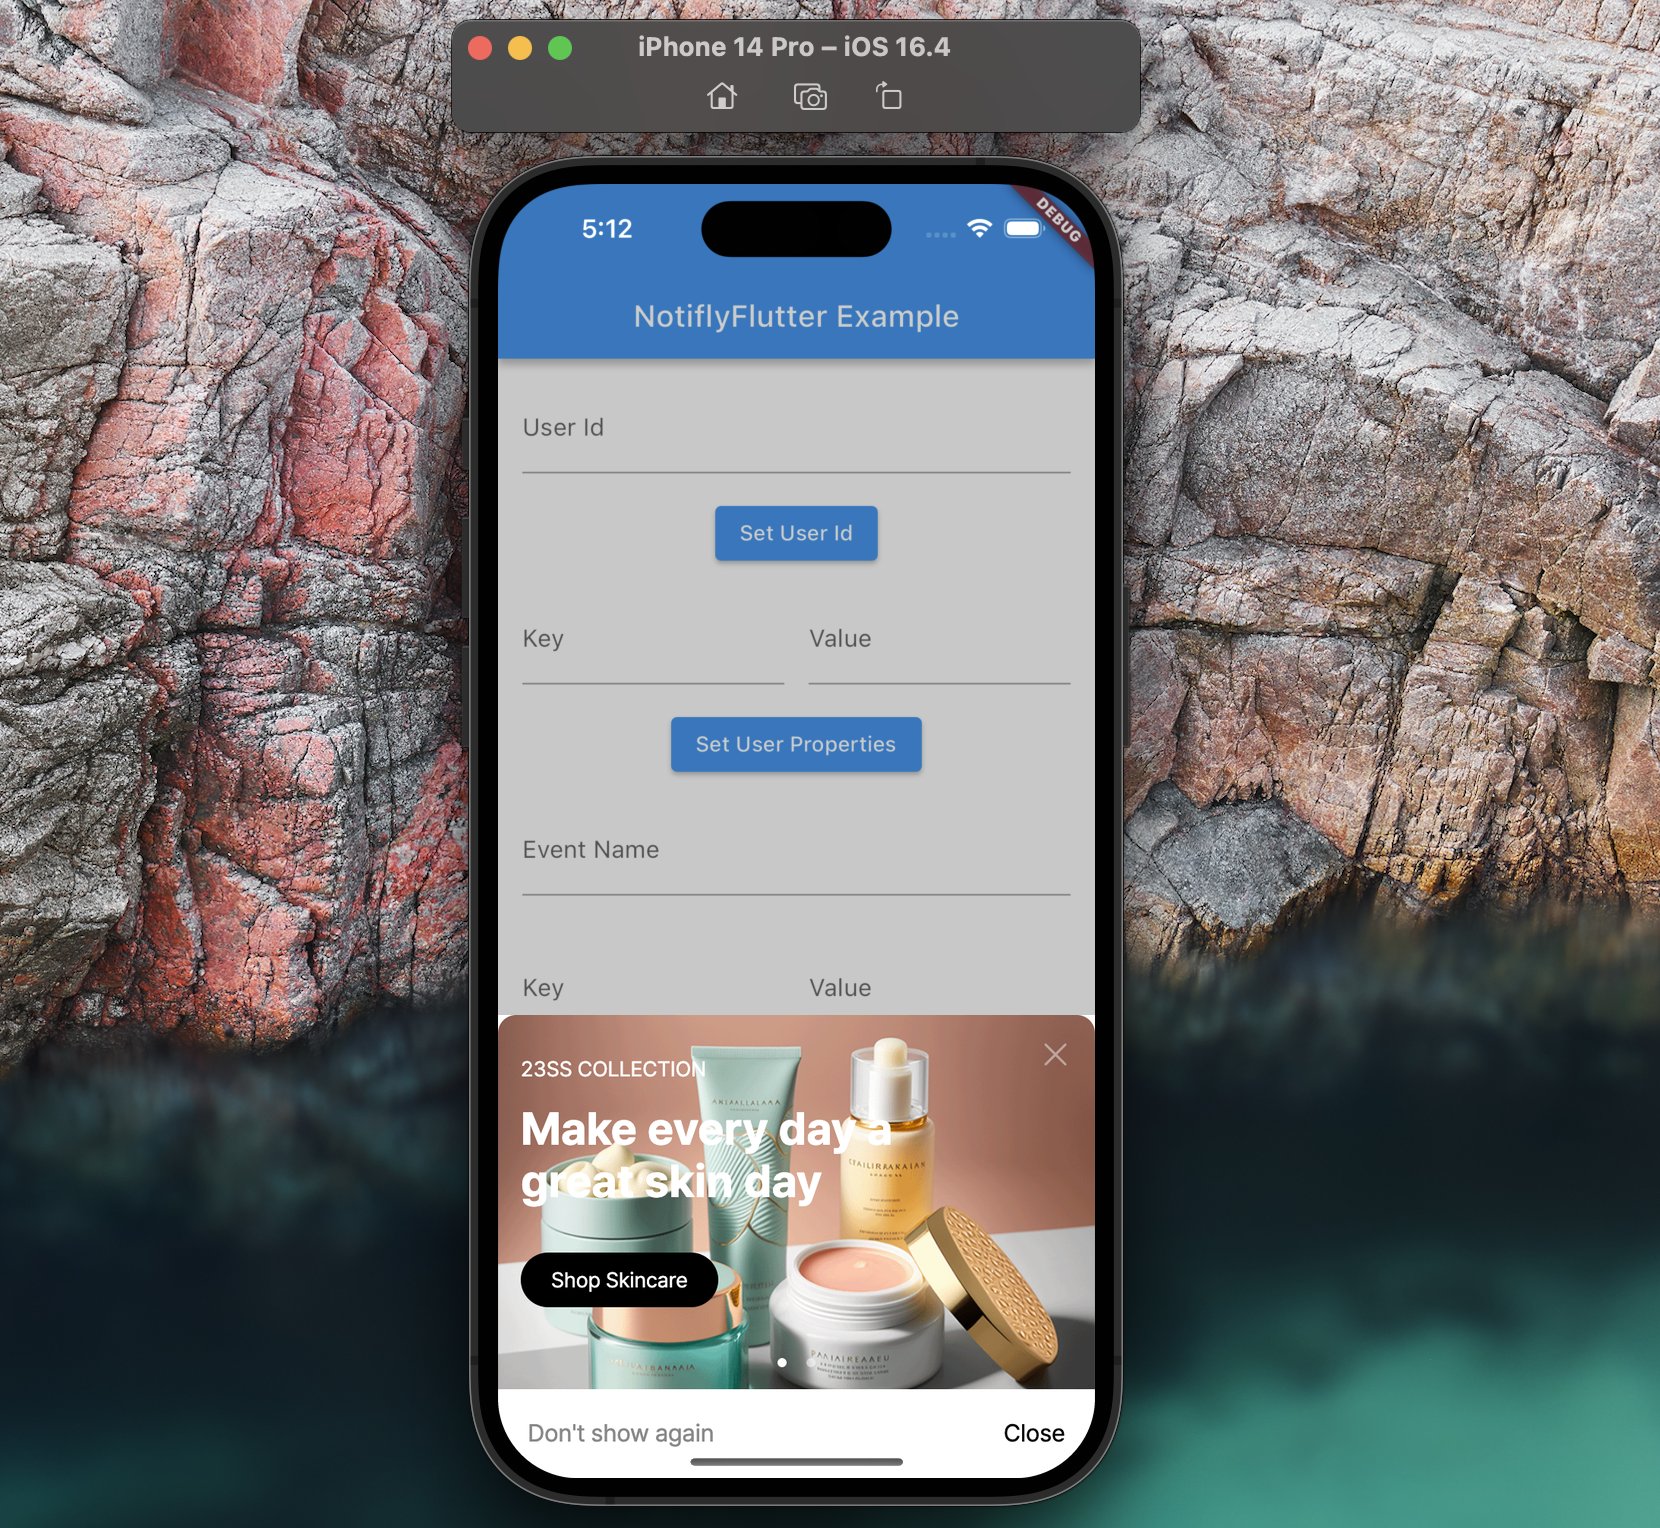
Notifly automatically logs internal events such asnotifly__session_start. Use this event to test whether an in-app popup appears.
1. Create an in-app popup template
- Open the in-app popup editor.
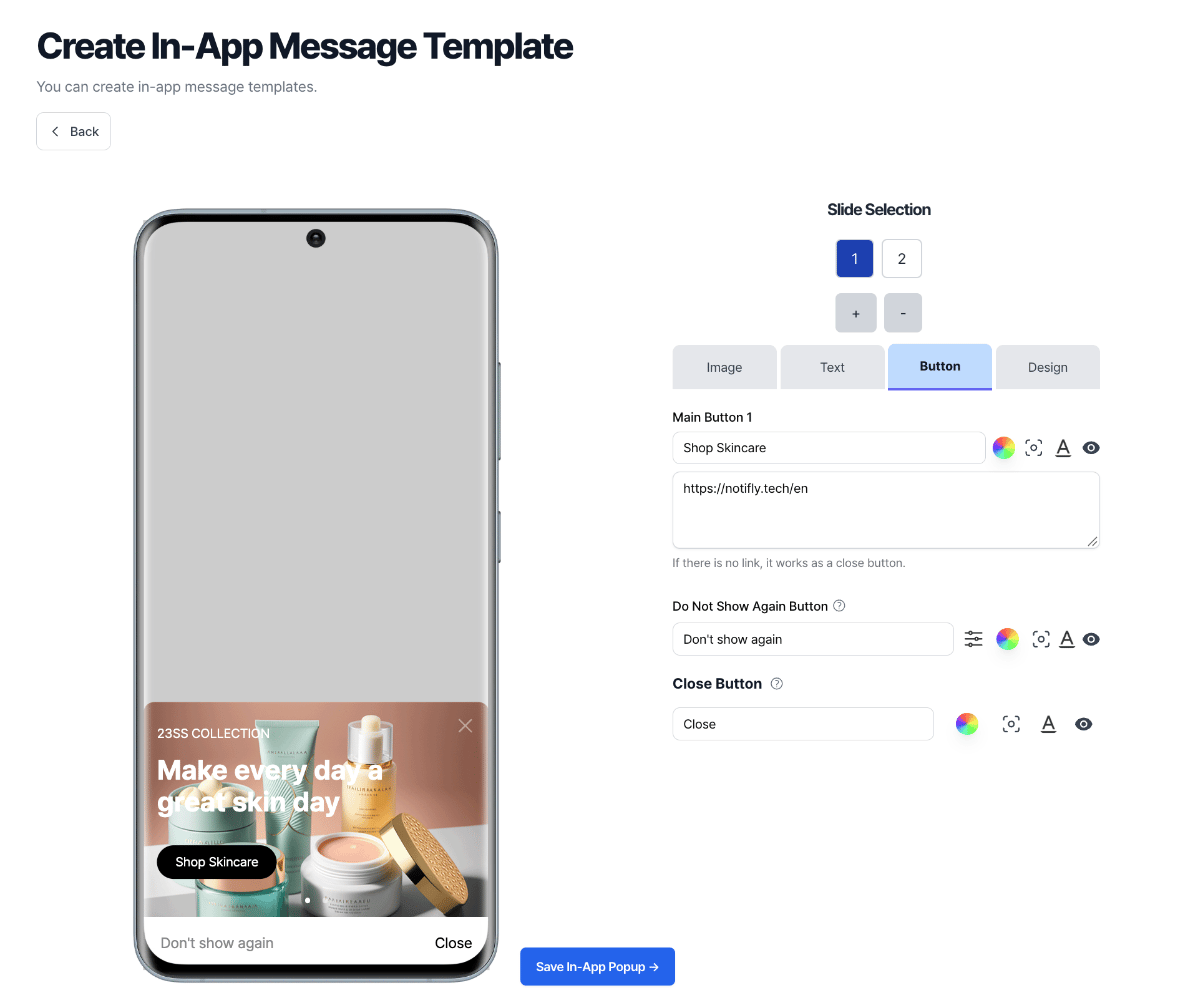
- Select a template and configure Image, Text, Button, and Design.
- In Button, you must enter the destination link for
main_button.
- In Button, you must enter the destination link for
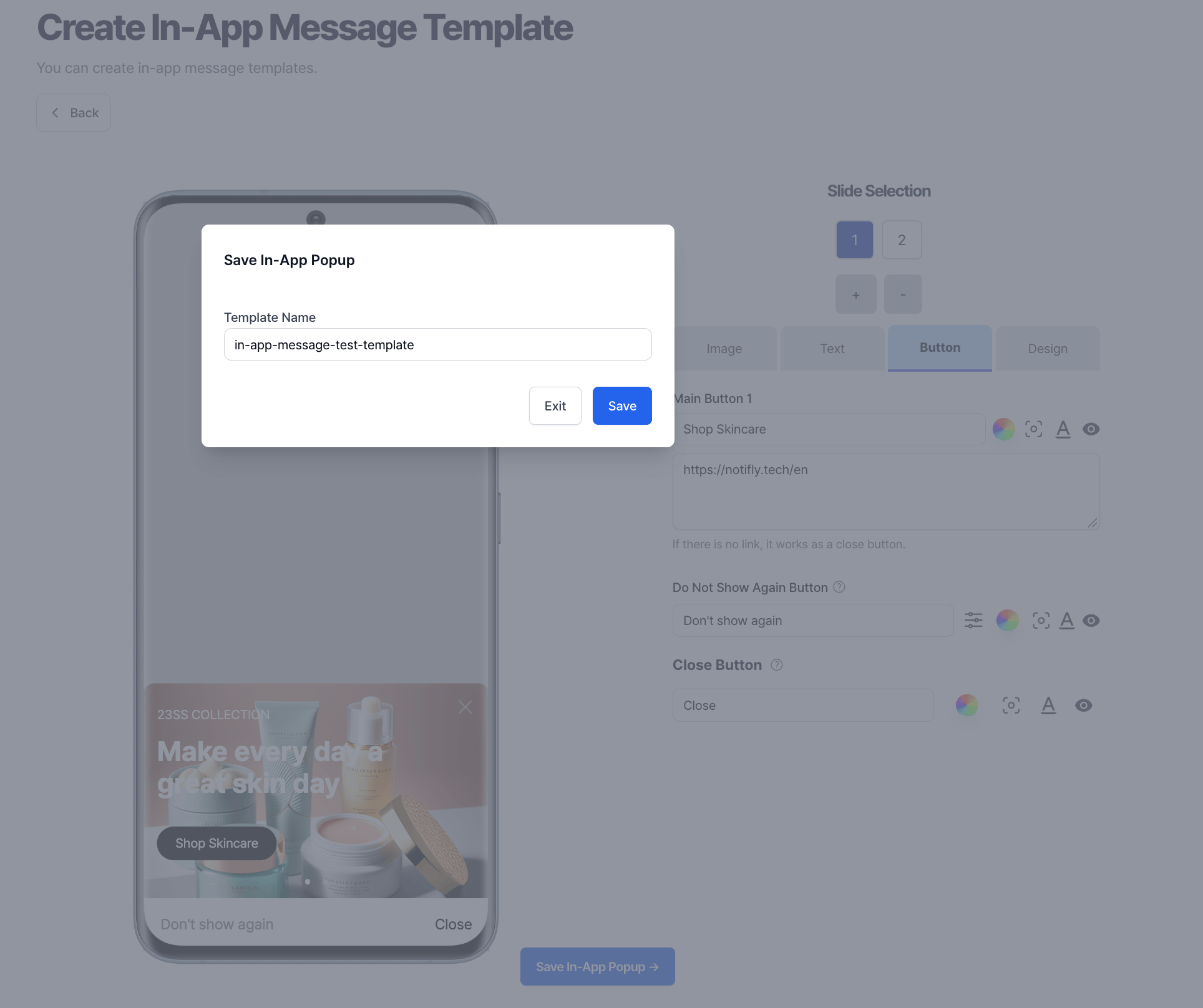
- Click Save, enter a template name, and save the template.
2. Create a test campaign
- Open the campaign creation page.
- Select the development or production project that contains the test user.
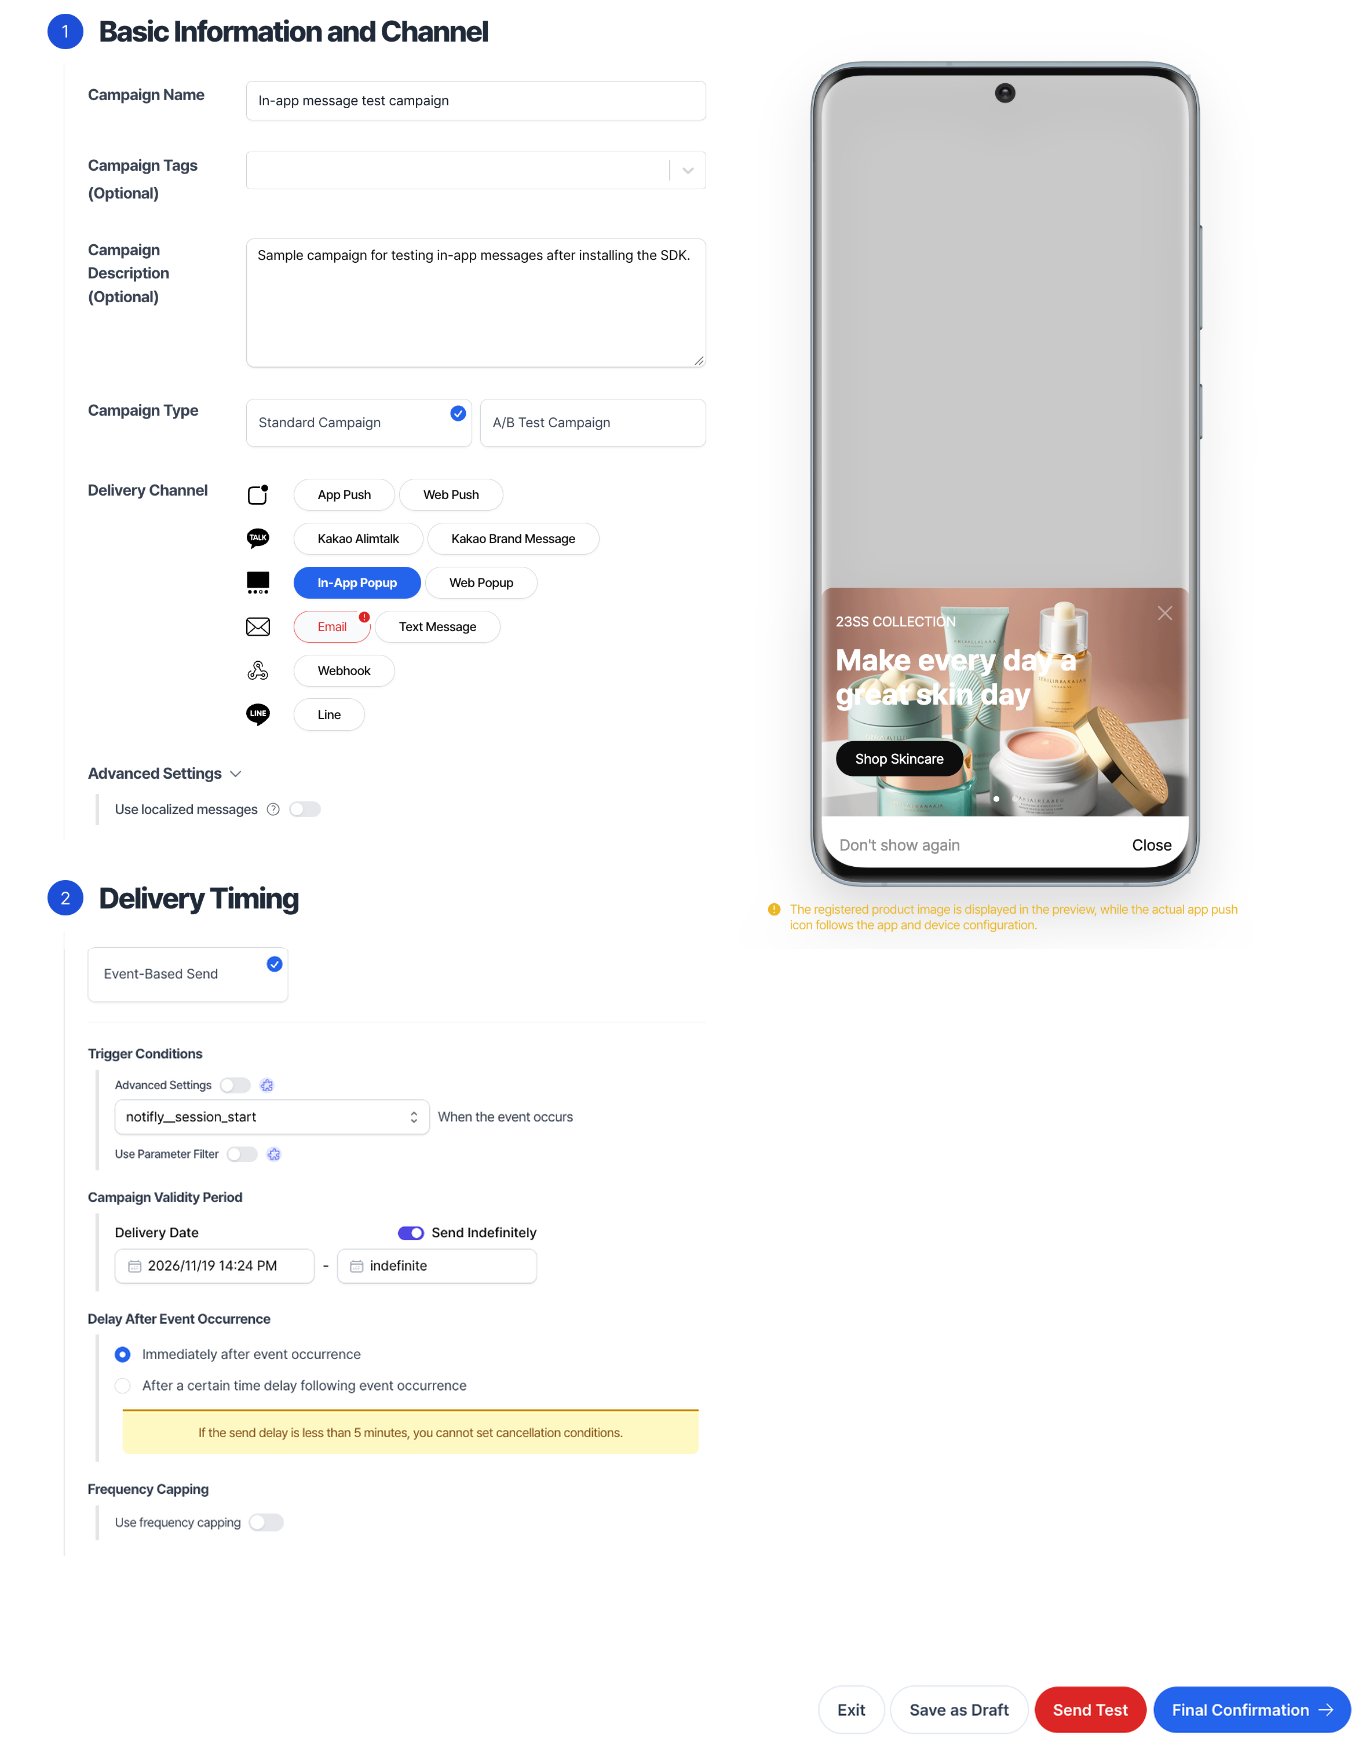
- Under Basic Information and Channel, configure the following.
- Enter a campaign name.
- Select In-App Popup as the channel.
- Under Delivery Timing, configure the following.
- Select Event-Based Send.
- Turn on Send Indefinitely.
- Enter
notifly__session_startas the event. - Under Delay After Event Occurrence, select Immediately after event occurrence.
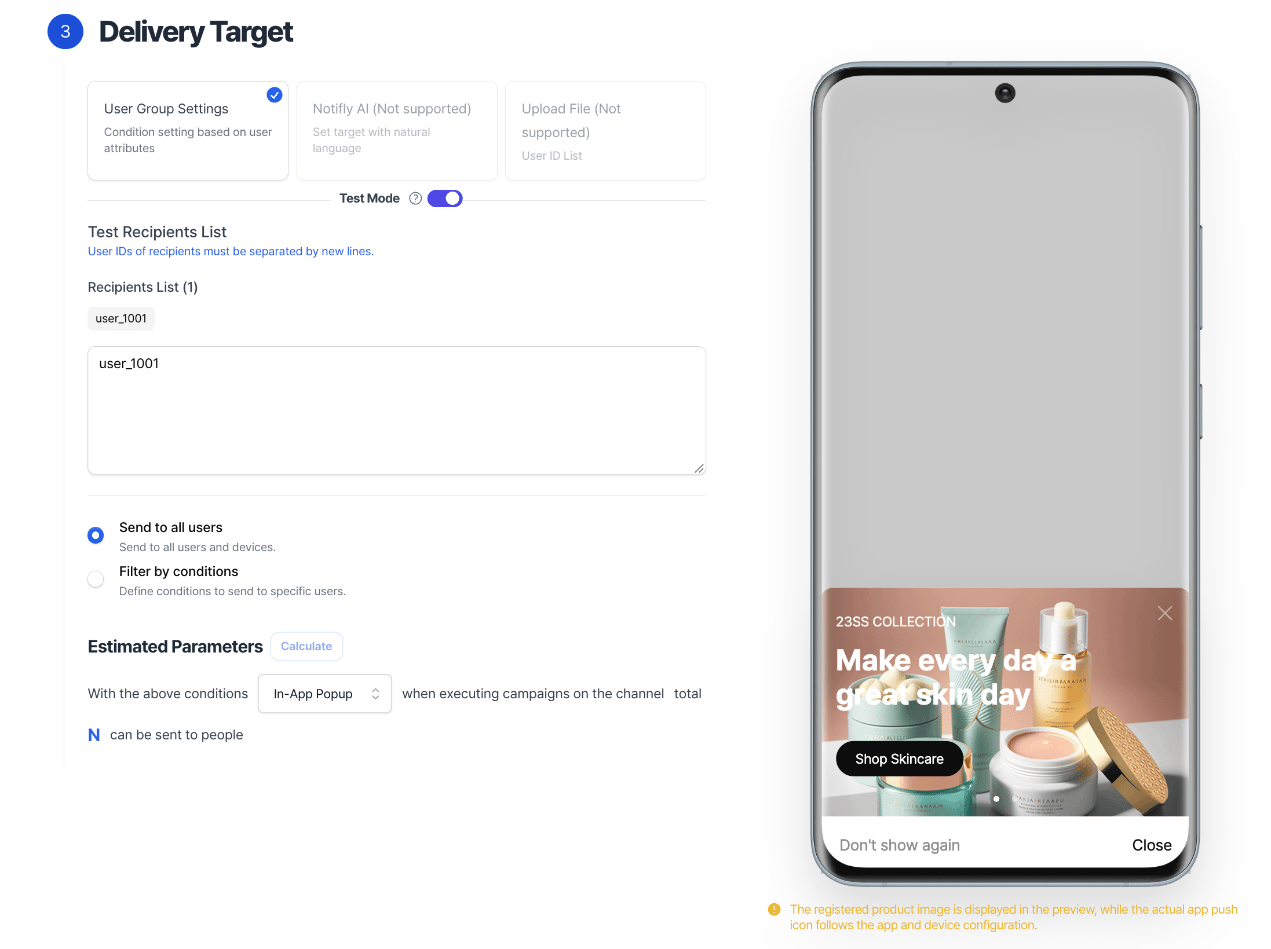
- Under Delivery Target, enable Test Mode and enter the test user ID.
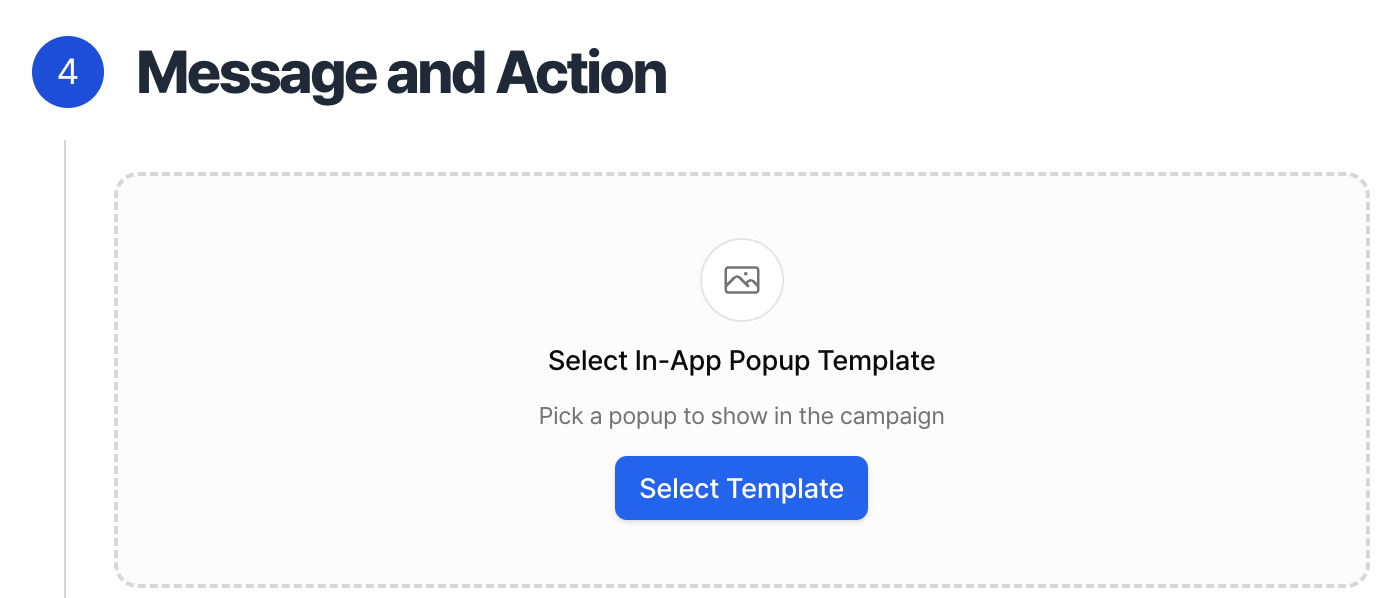
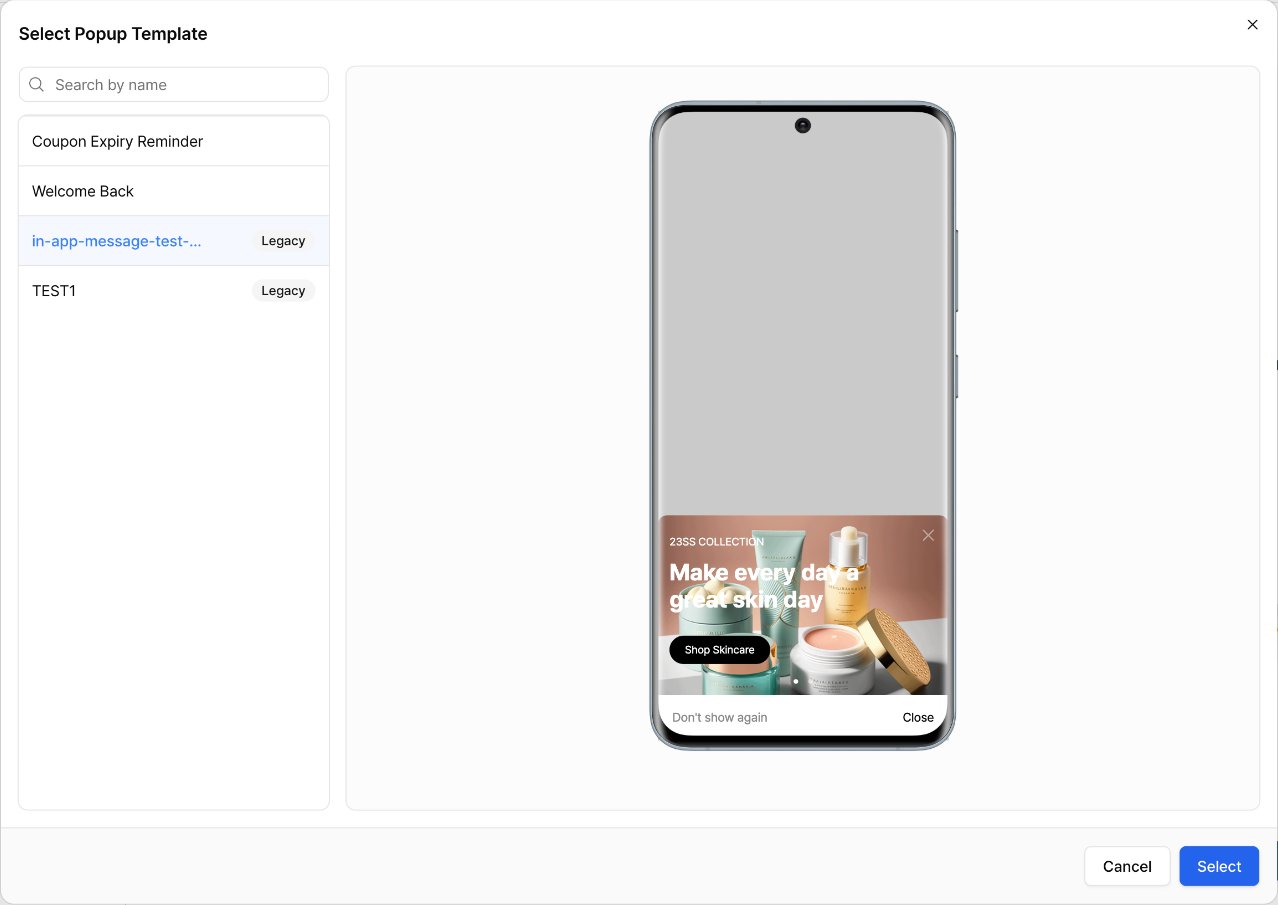
- Under Message and Action, select the in-app popup template that you created in step 1.
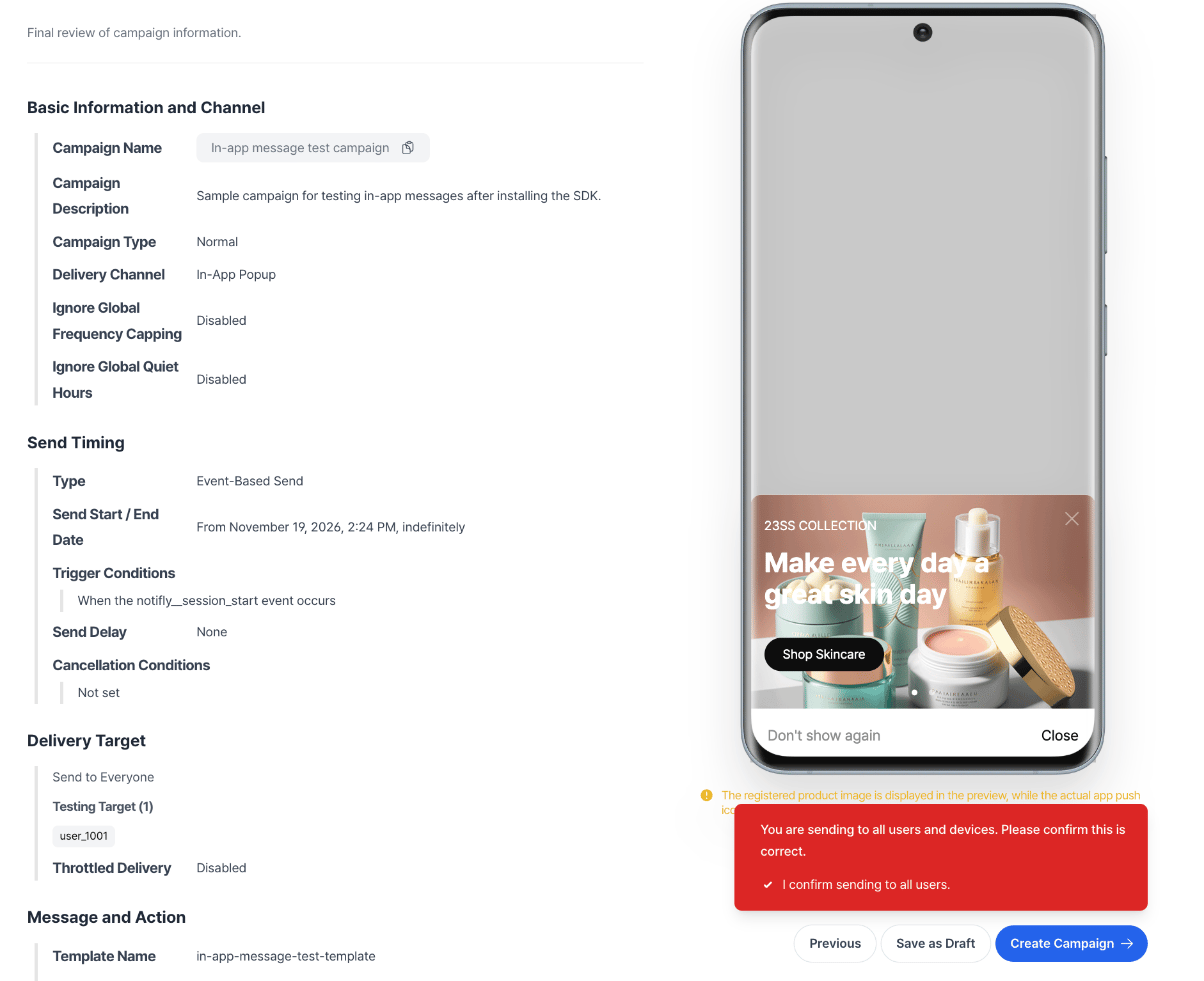
- Review the final settings and create the campaign.
3. Check the message on the test device
- Fully terminate the app on the device registered with the test user ID.
- Open the app to trigger
notifly__session_start. - Check that the in-app popup appears.
5. Test web push notifications
1. Send a test message
- In the console, open the campaign creation page.
- In the tabs in the upper-right corner, select the project that contains the test user.
- Under Basic Information and Channel, select Web Push.
- Under Message and Action, write the push message.
- Enter the notification title in Message Title.
- Enter the notification text in Message Content.
- Under Action, enter the URL to open when the user clicks the notification.
- Test both the foreground and background states.
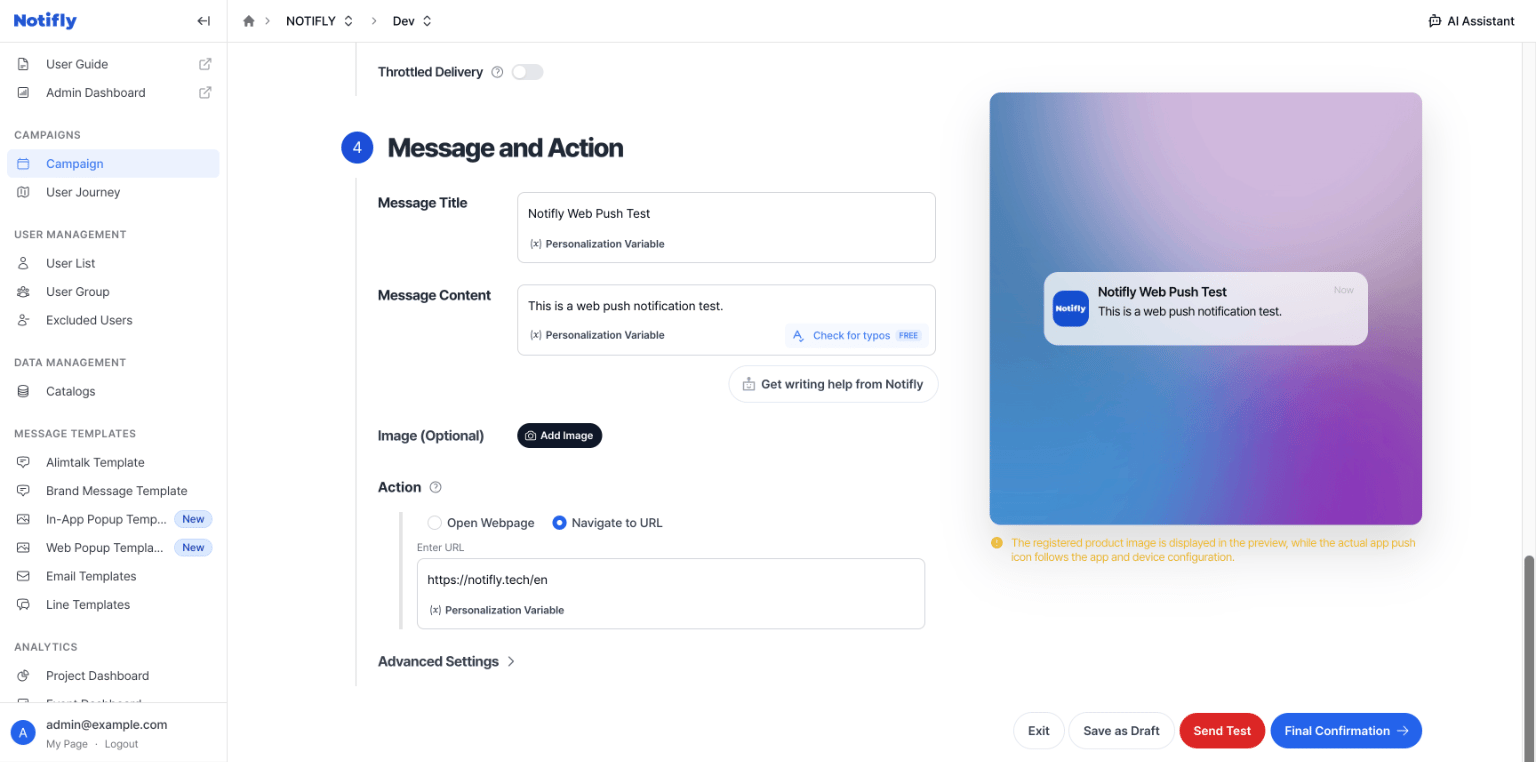
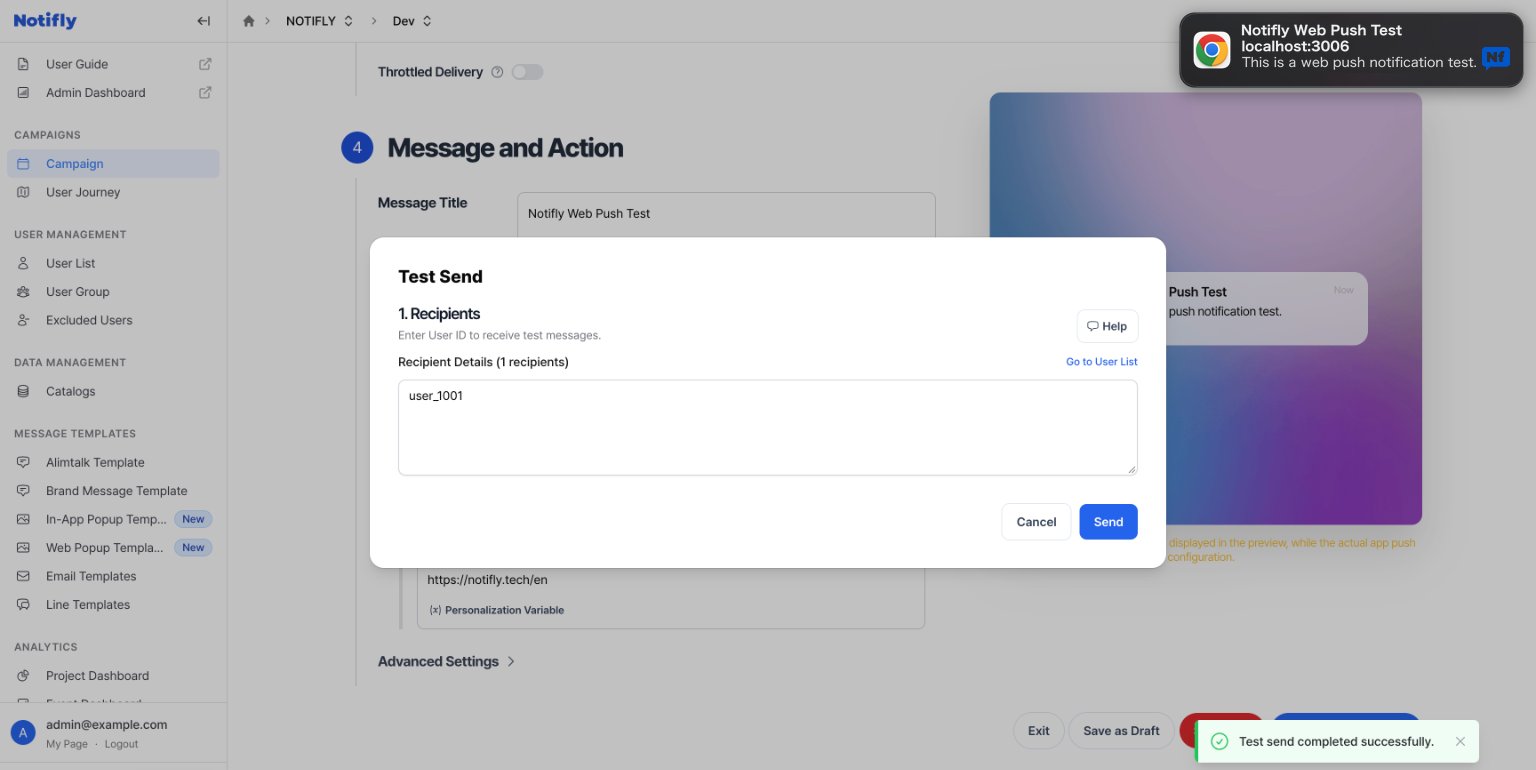
- Click Send Test in the lower-right corner. In the Test Send dialog, enter the test user ID under Recipients and click Send. The console displays “Test send completed successfully.”
2. Troubleshoot delivery
If web push notifications do not arrive, check these common causes.Device permissions
Device permissions
On macOS and Windows, allow notifications for the browser in the operating system settings.Example on macOS.
Browser permissions
Browser permissions
Browsers request notification permission differently. Check that notifications are allowed.Example in Chrome.

Browser version
Browser version