
Before you start
- A ChatGPT account
- An account that can sign in to the Notifly console
- Access to the Notifly product and project you want to use
- The ChatGPT desktop app, if you use the desktop connection
The ChatGPT desktop app shares MCP configuration with Codex CLI and the IDE extension on the same host. ChatGPT web does not read this configuration. Register the connection separately on the web. For CLI setup, see Notifly Remote MCP server.
Connect in the ChatGPT desktop app
- Open Settings in the ChatGPT desktop app.
- Open Plugins > MCPs.
- Select Add > Add MCP server.
- In Connect to a custom MCP, enter these values.
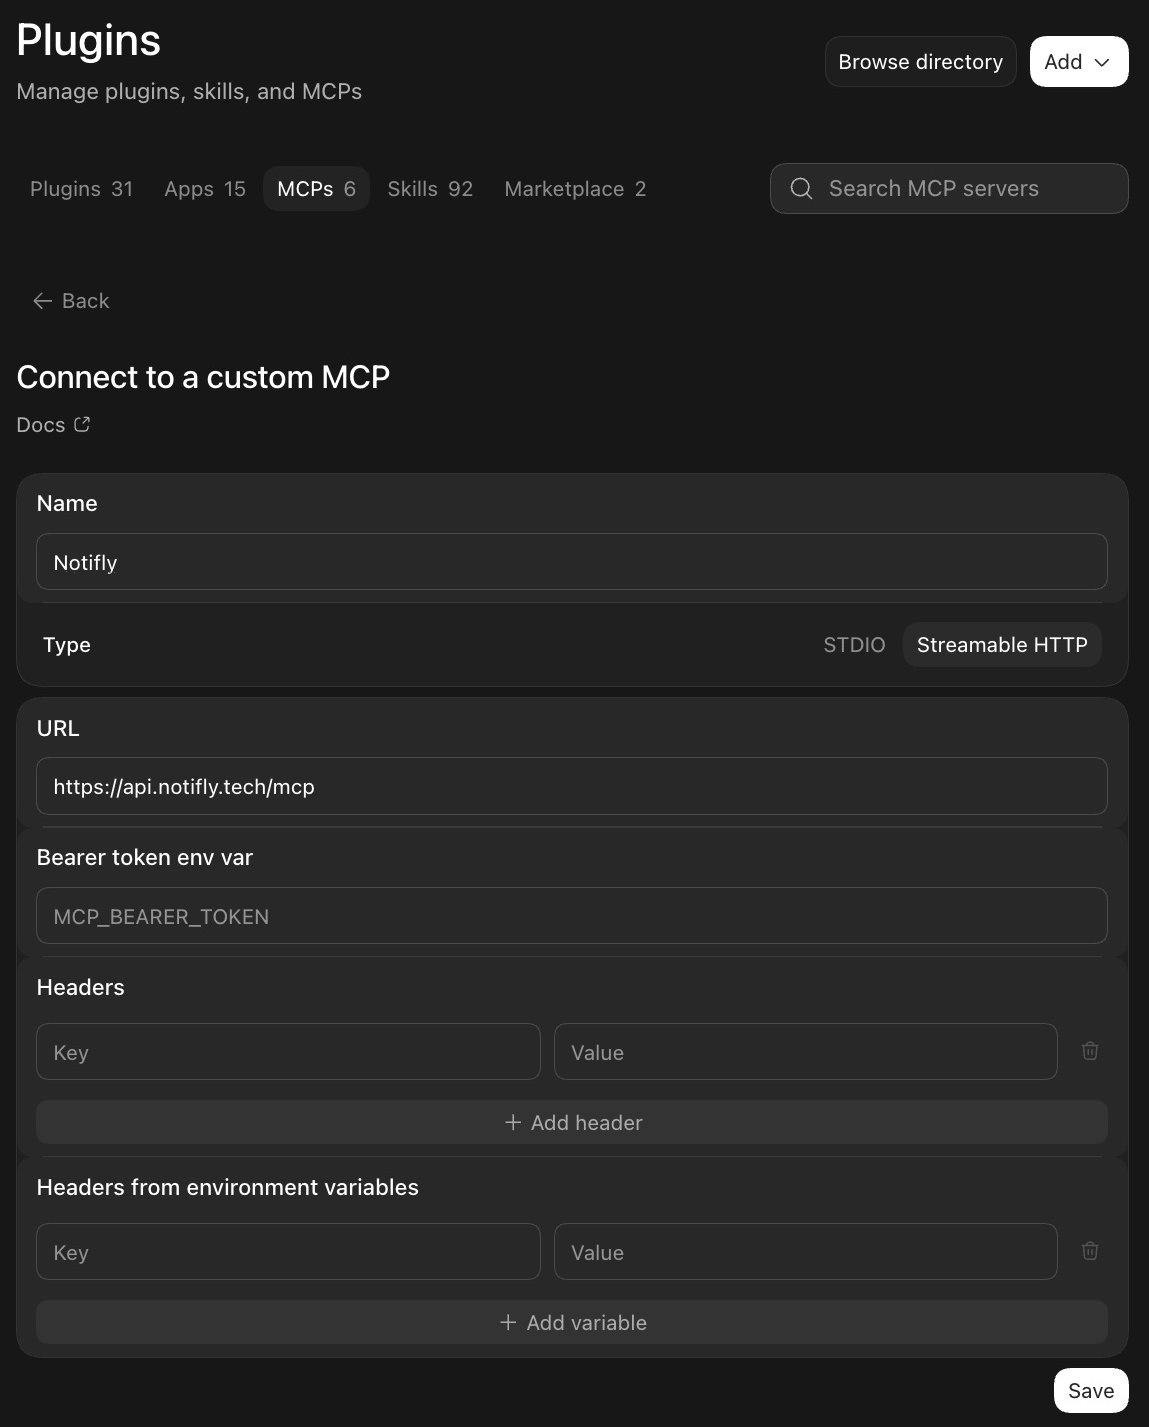
- Select Save. Select Restart if prompted.
- If Notifly requires authentication, select Authenticate.
- Sign in with your Notifly account in the browser.
- Return to ChatGPT and start a new conversation.
Check the connection
Type/mcp in the message box. Check that Notifly is enabled and authenticated.
Connect in ChatGPT web
Add a custom MCP server from Plugins. The current Plugins flow does not require Developer mode.- Open ChatGPT Plugins.
- Select + > Add custom MCP server.
- Enter these values. Add a description if the form requires one.
- Review the warning and select I understand and want to continue.
- Select Create as a plugin. Review the discovered tools.
- Complete the Notifly OAuth sign-in when prompted.
- Install the plugin if needed. In a new conversation, type
@and select Notifly.
Disconnect or authenticate again
ChatGPT desktop app
- To disconnect, remove or disable Notifly under Settings > Plugins > MCPs.
- If Notifly requires authentication, select Authenticate and sign in again.
ChatGPT web
- Open the Notifly plugin under Plugins or Settings > Plugins and remove the connection.
- To use a different Notifly account, remove the existing connection and register the same URL again.