
The SDK supports the following features:
- Register devices with Notifly to receive push notifications and display in-app popups. (In-app popups appear only while the app is in the foreground.)
- Send event and user data to Notifly for campaign targeting and analysis.
- Log user behavior as events and measure campaign performance.
Prerequisites
- Connect your Firebase project.
The Notifly iOS SDK uses Firebase Cloud Messaging to send push notifications.
Connect Firebase
- Register your APNs credentials for iOS.
Register APNs credentials
1. Configure iOS
1. Configure capabilities
- Set the target’s minimum iOS version to 15.0 or later. If you use CocoaPods, set the same minimum version in your Podfile.
-
Enable Push Notifications and Background Modes, including Remote notifications and Background fetch.
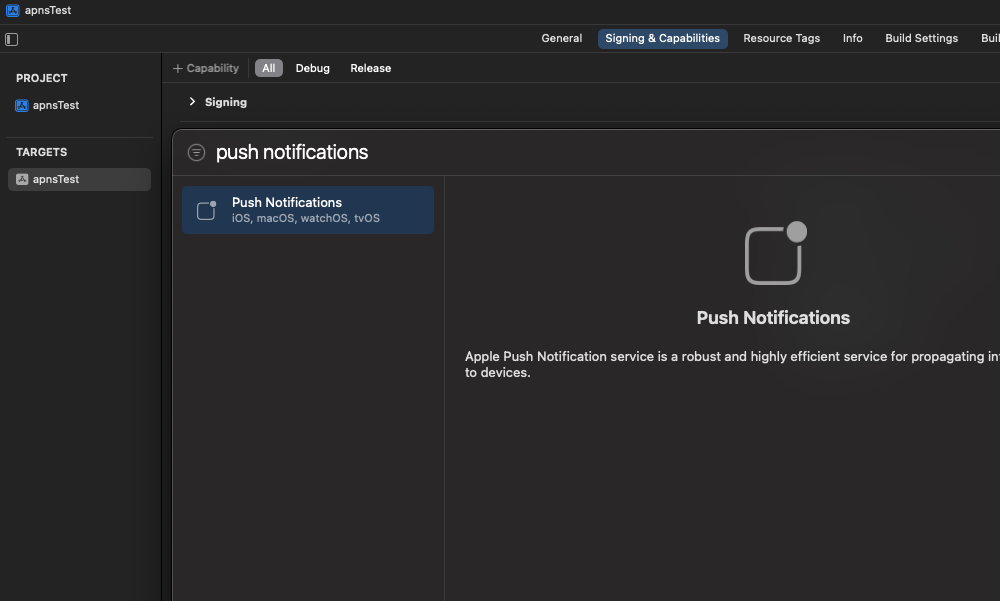
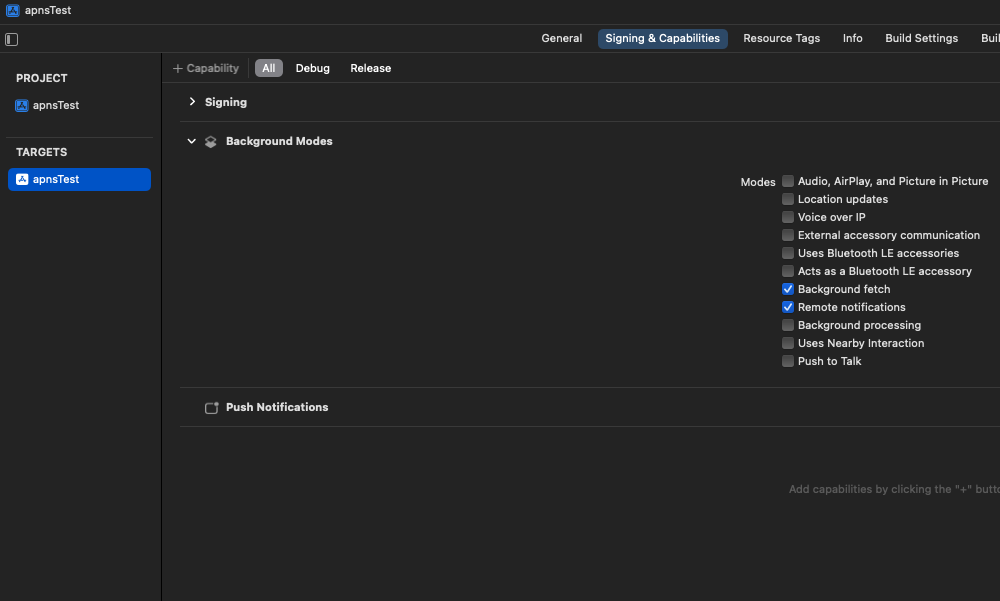
2. Install the iOS SDK
Install the Notifly iOS SDK with CocoaPods or Swift Package Manager.- CocoaPods
- Swift Package Manager
- Make sure your Xcode project uses CocoaPods. If it does not, follow the CocoaPods setup guide.
- At the top of your Podfile, add
platform :ios, '15.0'or specify a later iOS version. - Add the following code to your Podfile.
Podfile
3. Configure AppDelegate
Update AppDelegate so that the Notifly SDK can communicate with the iOS notification system.1. Create an AppDelegate in a SwiftUI project
Your SwiftUI project may not have an AppDelegate file.
If the file is missing, create it as follows.
AppDelegate.swift
@UIApplicationDelegateAdaptor(AppDelegate.self) var appDelegate to your App.swift file:
<YOUR_PROJECT_NAME>App.swift
2. Initialize Notifly and configure delegates
Add the following import toAppDelegate.swift.
UIApplicationDelegate methods in AppDelegate.swift to initialize the SDK and handle APNs registration.
Find
projectId and username on the settings page. password is a placeholder for backward compatibility. Pass the same nonempty value as username. Do not pass a real password or API Secret Key. AppDelegate.swift
UNUserNotificationCenterDelegate methods to forward push notification events to Notifly.
UNUserNotificationCenterDelegate
4. Register user information
Notifly uses user identifiers (userId) and user properties (params) to personalize marketing campaigns.Registered user information supports segmentation and targeting for channels such as push notifications, email, and Kakao AlimTalk.
1. Set the user ID (Notifly.setUserId())
Map userId to the identifier of the signed-in user in your app.Notifly uses this value to track user events and personalize campaigns.
Parameters
Clear the user ID
On sign-out, callNotifly.setUserId(userId: nil) to clear the association between the current device and the user.
To retain the same user data, manage it separately on your server or in your app.
- iOS
setUserId
2. Set user properties
setUserProperties registers properties for the user.These properties support segment targeting, message personalization, and delivery channel selection.
Before you send sensitive user propertiesBefore you send a custom user property that needs protection, such as a name or address, register it with the exact key you plan to send and enable encryption under User Management > User List > Property management in the console.See Manage user properties for setup instructions and limitations.
Parameters
Key-value pairs of user properties. Supports predefined keys such as
$email, $phone_number, and $line_user_id.$email: Email address for email campaigns.$phone_number: Phone number for SMS and Kakao campaigns.$line_user_id: LINE user ID for LINE message campaigns.- Custom fields: Define your own fields, such as
"plan","tier", and"country".
- iOS
setUserProperties
5. Log events
Record user behavior to use in campaign triggers, segment conditions, and performance analysis.For example, collect button clicks, page visits, and completed purchases as events.
Parameters
Use
segmentationEventParamKeys to make an event parameter (eventParams) available for targeting. You can specify at most one key.- Swift
trackEvent
6. Get the internal user ID
getNotiflyUserId() returns the unique user ID that Notifly manages internally.This ID is separate from the user ID set with
setUserId(). Most integrations do not need it.Use it when an external CRM or third-party integration requires Notifly’s internal user ID.
7. Configure an iOS Notification Service Extension (recommended)
Requires
notifly-sdk version 1.3.0 or later. Supported features
- Attach images and videos to push notifications.
- Track push notification delivery to analyze campaign performance in more detail.
8. Test the integration
After you install the SDK, follow Test your integration to verify event collection and push notification delivery.9. Advanced integration
Request push notification permission
In-app popup event listener
Rich push notifications
FAQ
Can I use Notifly with an existing Firebase Cloud Messaging integration?
Can I use Notifly with an existing Firebase Cloud Messaging integration?
The Notifly iOS SDK can work alongside Firebase Cloud Messaging that your app already uses.
Push tokens are not forwarded or in-app popups do not work in a SwiftUI project.
Push tokens are not forwarded or in-app popups do not work in a SwiftUI project.
In a SwiftUI app, the Firebase SDK’s method swizzling may fail to forward delegate calls correctly.
(Related issue: firebase-ios-sdk#7473)In Info.plist, set After disabling swizzling, forward the APNs token to Firebase manually:
FirebaseAppDelegateProxyEnabled to the Boolean value NO to disable swizzling.Info.plist
AppDelegate.swift